Are you tired of struggling with coding or making your design concept a reality?
With powerful tools like the Divi Page Builder plugin for WordPress, anyone can easily create professional-grade websites. In this detailed guide, We’ll show you How to Install Divi Page Builder in WordPress website through 3 different methods.
Table of Contents
What is the Divi Page Builder plugin?
Divi is a popular page builder plugin for WordPress, with millions of users worldwide. It is well-known for its simple drag-and-drop interface, allowing users to create bespoke layouts and designs without requiring coding experience.
How to Install Divi Page Builder in WordPress?
There are three different methods to install Divi Page Builder in a WordPress website. We’ll discuss each of them in detail.
Method 1: Install Divi Page Builder With Upload Plugin Feature
Go to your Elegant Themes membership area and download Download Divi Builder Plugin. It will be in ZIP format.

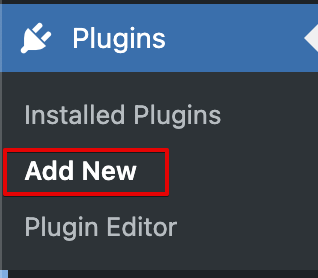
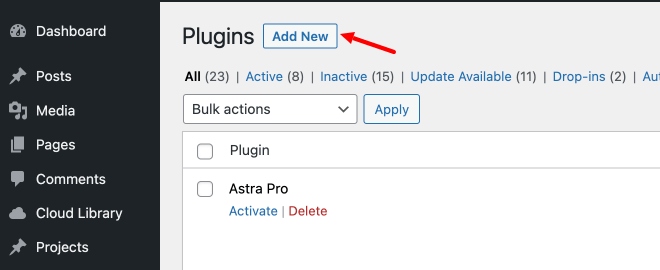
From your WordPress dashboard, go to Plugins > Add New.

Click “Add New” from the Plugins menu.

Click “Upload Plugin” Choose the “Zip file” and Select “Install Now“

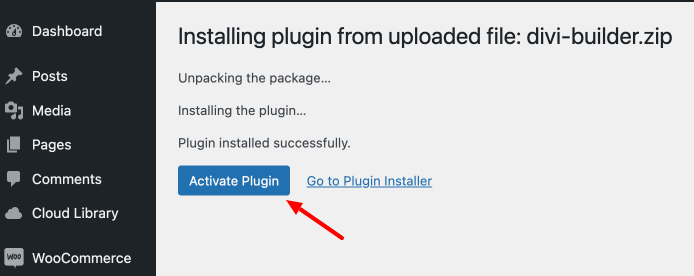
Click the “Activate” button to activate the plugin after installation.

Method 2: Install Divi Page Builder on WordPress With FTP
This method is slightly more technical, but don’t worry! We will guide you through the whole process.
Create an Account
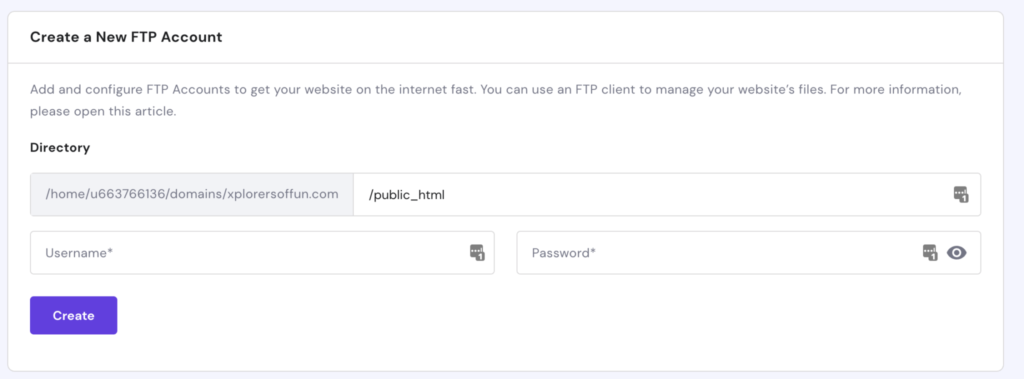
Create an FTP Account by going to FTP Accounts from your cPanel.

Enter your username and password and then click on the Create button.

Once the account has been created, it will appear in the account list.
The next step is to download an FTP client to your computer. You can either pay for one or select from a variety of free options.
Now that you’ve created your FTP account, let’s see how to use it to install the Divi Builder.
Upload the Plugin’s Files
Log in using your FTP application.

Upload the Divi Builder installation files into the /plugins/ folder of your website.
Once the file has been successfully uploaded, use the File Manager tool from your web hosting provider’s dashboard.

Right-click on the Divi Builder file that you just uploaded in the /plugins/ folder and extract it.
Now, Go to Plugins > Installed Plugins and activate the Divi Builder.
Method 3: Install Divi Page Builder Plugin Using the Divi Theme
Go to your Elegant Themes membership area and download the Divi Theme ZIP file. Go to Appearance > Themes in your WordPress dashboard.

Click on the Add New button. Then, click on the Upload Theme button.
Upload the ZIP file from your computer and then activate the theme to use it on your website.
The Divi Builder is included with the Divi theme and does not require a separate plugin installation.
How to Edit a Page in Divi Builder?
- Select “Pages” from the sidebar and then the page you want to update.
- Once you’ve chosen a page, you’ll notice an option to “Edit with Divi Builder” at the top. Click it to access the Divi Builder interface.
- The Divi Builder will divide your page into sections and components.
- Select the area or module you want to change.
- After you’ve selected a section or module, editing options will appear. You can edit the content, adjust the styling, add new elements, or remove existing ones.
- After making your changes, click the “Save” button to save them immediately.
- Before you publish your changes, click the “Preview” button to see how your page will look.
Conclusion
Finally, the Divi Page Builder plugin is a shining example of innovation in website design. It seamlessly combines user-friendly functionality with deep customization choices. We hope this detailed Divi builder installation helps you a lot.
FAQs
Can you use Divi offline?
You don’t need an internet connection. You can work on your website offline. Divi Cloud requires an internet connection to access your layouts.
What should I do if I encounter a bug?
Check the Elegant Themes support forum and documentation. If the issue persists, contact Elegant Themes support for assistance.
Can I use DIVI on multiple websites?
Yes, with an Elegant Themes membership, you can use DIVI on unlimited websites.


