There are hundreds of thousands of free and premium WordPress themes. Avada is one of the most popular and adaptable WordPress themes, known for its adaptability, customization options, and attractive look. In this article, we’ll walk you through How to Install and Setup Avada Theme WordPress.
Table of Contents
What is Avada Theme WordPress?

Avada, created by ThemeFusion, has been a popular choice among website designers, developers, and business owners. Avada’s easy drag-and-drop page builder and a large library of pre-designed templates and demo content enable users to construct professional and visually appealing websites for a wide range of applications, including company websites, portfolios, blogs, e-commerce businesses, and more.
How to Install Avada Theme in WordPress?
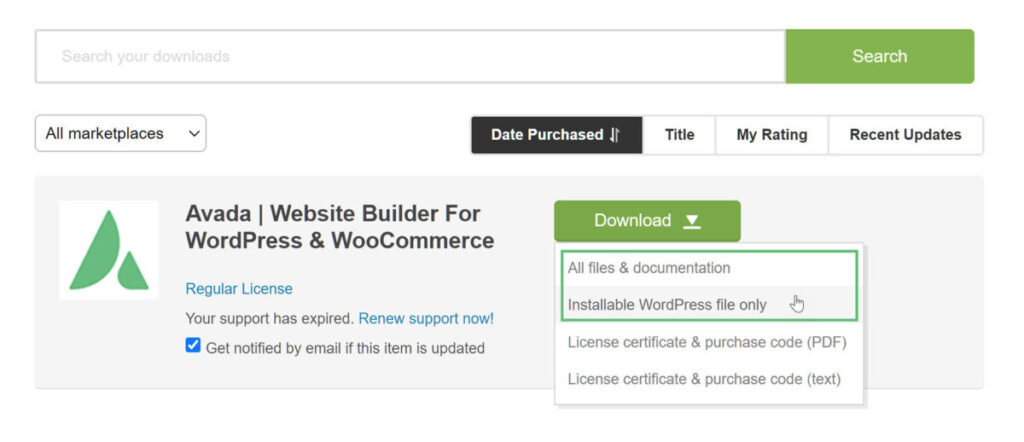
Log in to your ThemeForest account navigate to your ‘Downloads’ tab and then locate your Avada purchase. Click the ‘Download’ button and choose to either download the ‘Installable WordPress file only’, which is just the WordPress installable file or choose to download ‘All Files & Documentation’ which is the full Avada Website Builder package.
After purchasing the theme and downloading it from Themeforest, you will have a .zip file with the theme files inside.
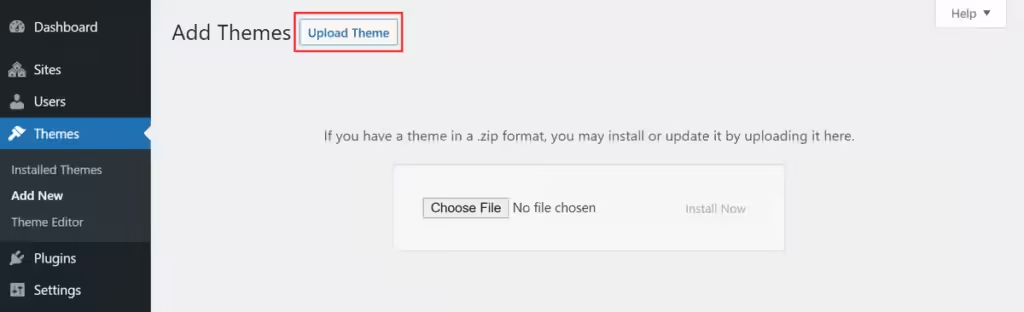
To install the Avada theme, Go to WordPress Dashboard> Appearance and then Themes.

Click on Upload Themes > Install Now > Activate
Once the theme is activated, you’ll see Avada’s Welcome page.
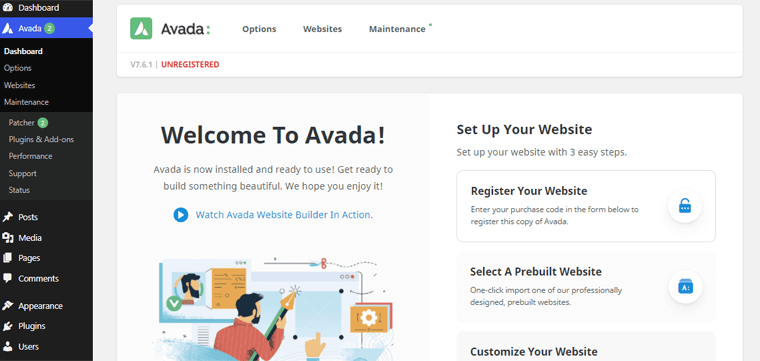
On scrolling down the Welcome page navigation, you’ll see the ‘Register Your Website’ option. There, you need to put the ‘Purchase Code’ that you previously got while purchasing the theme. Then, click on the ‘Register Now’ option.

And there you go with the Avada theme installed and activated on your site.
After activating, you will also need to install the required plugins for the theme to work. These the Fusion Core and the Fusion Builder two plugins are required.
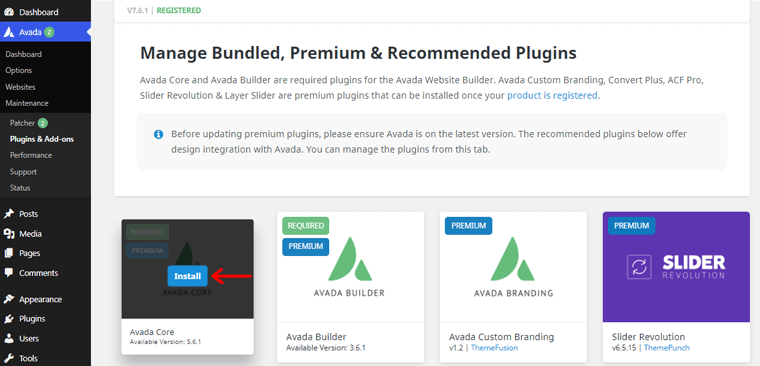
Install and Activate these required plugins.
How to Setup Avada Theme in WordPress?
Once you register, Choose the type of Setup Wizard you want to continue with; the Prebuilt Website Wizard, or the New Website Wizard, and then enter the basic details of your site(Site Title and Tagline).

1. Prebuilt Website Wizard
Step 1: Select A Website
When you select a Prebuilt website, the Setup Wizard is short because many of the available options are already included. The colors, typography, pages, and so on are all included with the import of the prebuilt site. So, your most important choice is to select a Prebuilt Site that best suits the design of the website you want to construct. Simply hover over your favorite website and select it.

Step 2: Finish
The final step of the Prebuilt Website Wizard just asks you to Complete the Setup and display the status of the prebuilt website import.
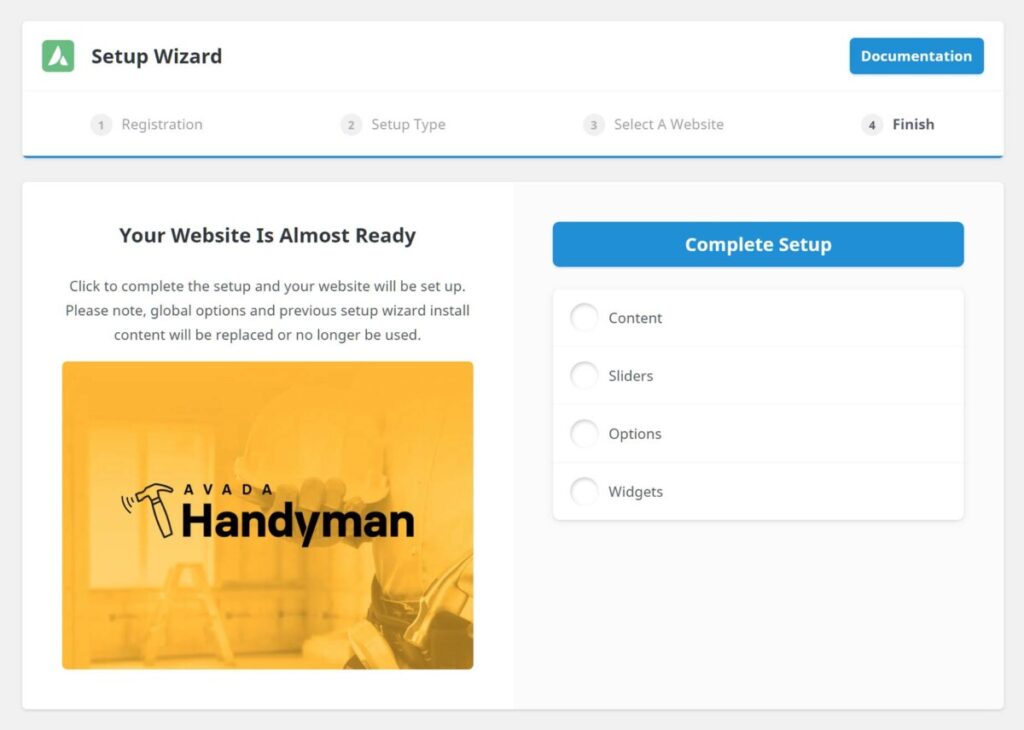
When the Wizard has finished its task, you are directed to the final page, which includes links to view or start editing your site, manage layouts, menus, global options, create a support account, and read the Avada documentation.

2. New Website Wizard
Step 1 – Colors
If you select the New Website option in “Setup Type“. You will be redirected to the next step, where you can select or build your website’s color palette. You can filter palettes by color, choose from prebuilt palettes, or create your own.
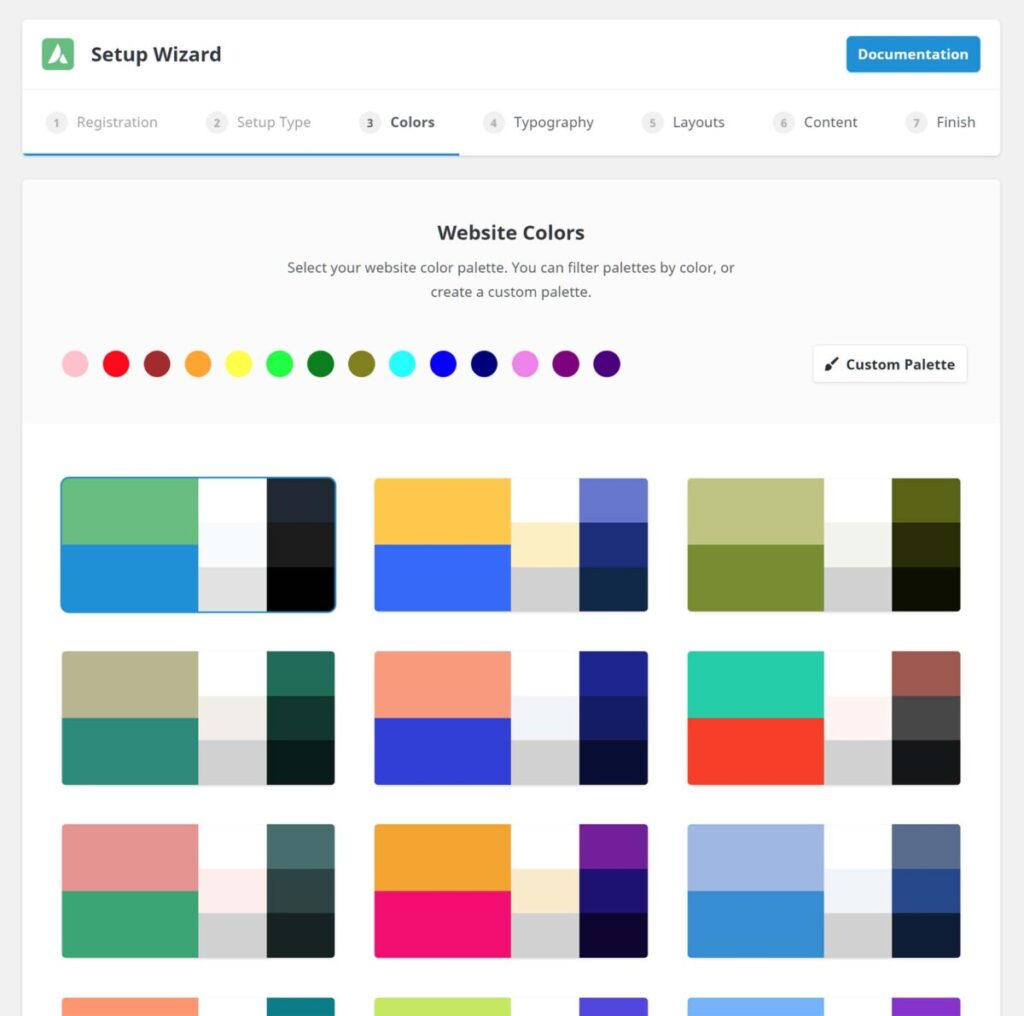
Here, you can choose whether your site should have light or dark skin. Light is the default, but Dark provides a visual representation of how your color selections will work. The arrow buttons also allow you to scroll through the many prebuilt palettes. To continue, select Next Step to get to Typography.

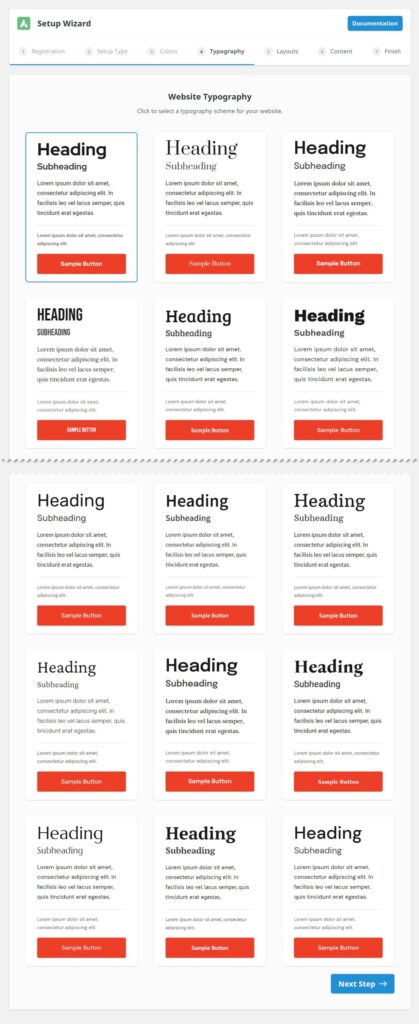
Step 2– Typography
In this step, you’ll select the best website typography scheme. There is a large selection of prebuilt typography sets to choose from. Just select one to go on to the next section. You can always change the typography settings later, in the Avada > Global Options > Typography tabs.
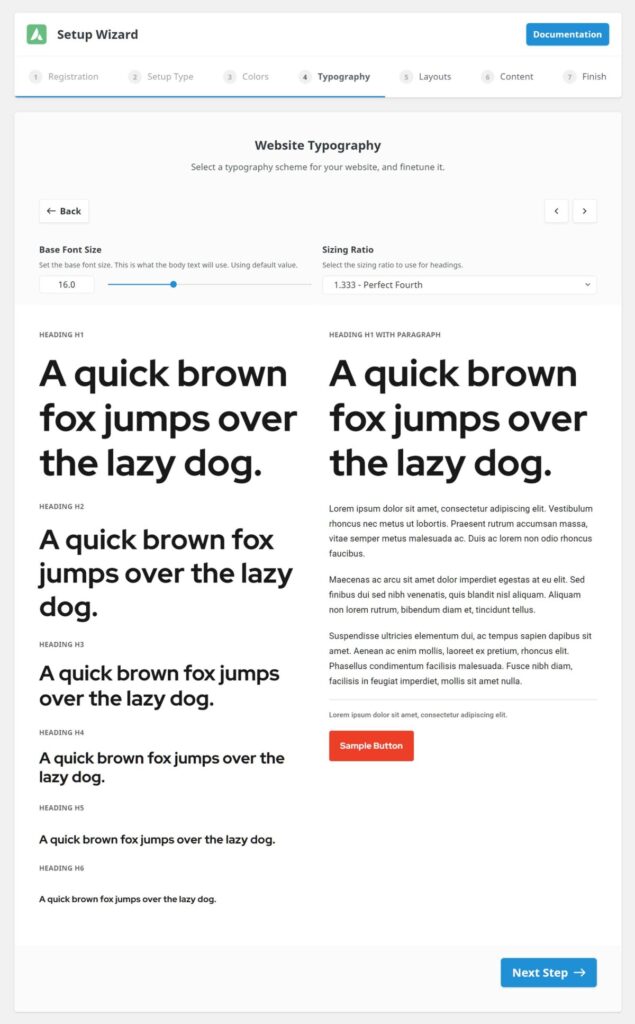
After you’ve made your initial font choices, the next page allows you to specify the Base Font Size and Sizing Ratio pattern for your Heading. After that Click Next Step.
Step 3 – Layouts
This phase allows you to choose your Header and Footer Layout, which will speed up your build. A standard header and footer are selected by default, but when you click on Select Header or Footer, you can select from a wide variety available in Avada Studio. You can also pick a logo at this point.

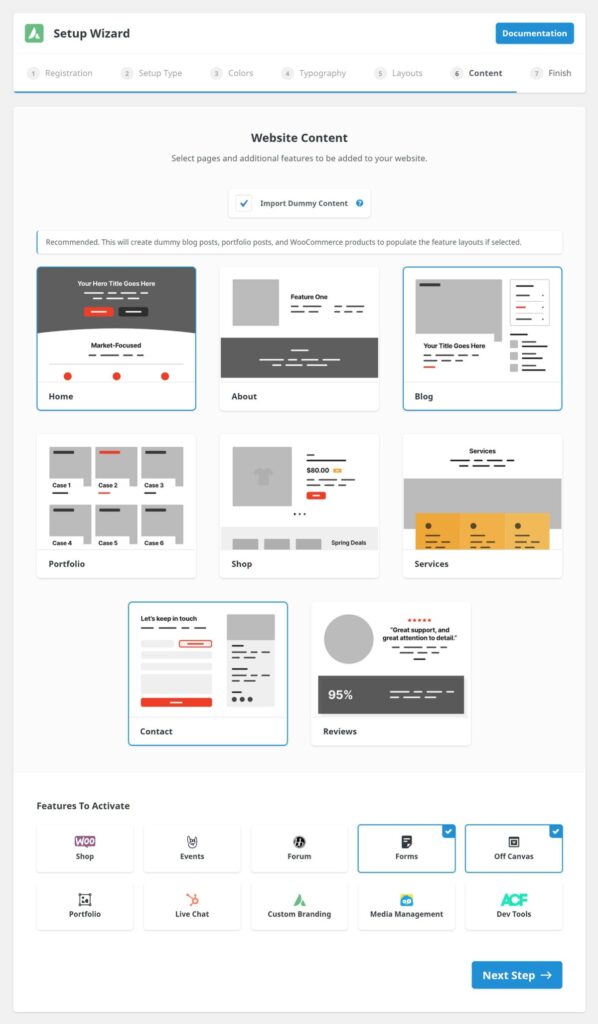
Step 4 – Content
You can create pages and other features for your website. This could be a simple page or a more advanced feature, such as a Shop. The basic pages (Home, About, Services, and Reviews) are created and populated with Avada Studio’s basic content.
At the top of the dialog, Import Dummy Content is selected by default. This creates dummy blog posts, portfolio pieces, and store products so you can better understand the layouts for these items, and sets you up with a fully functioning feature that you can then customize with your content.
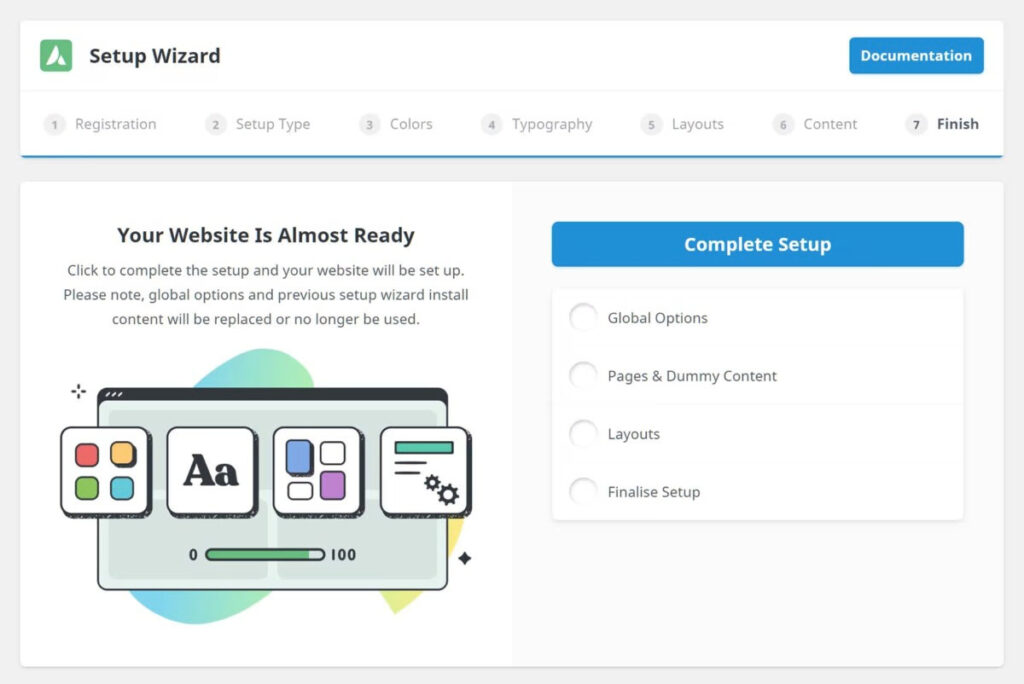
Step 5 – Finish
In Step 7, the Setup Wizard combines all of the information provided and prepares every selection for implementation. Simply click Complete Setup, and the Setup Wizard will completed.
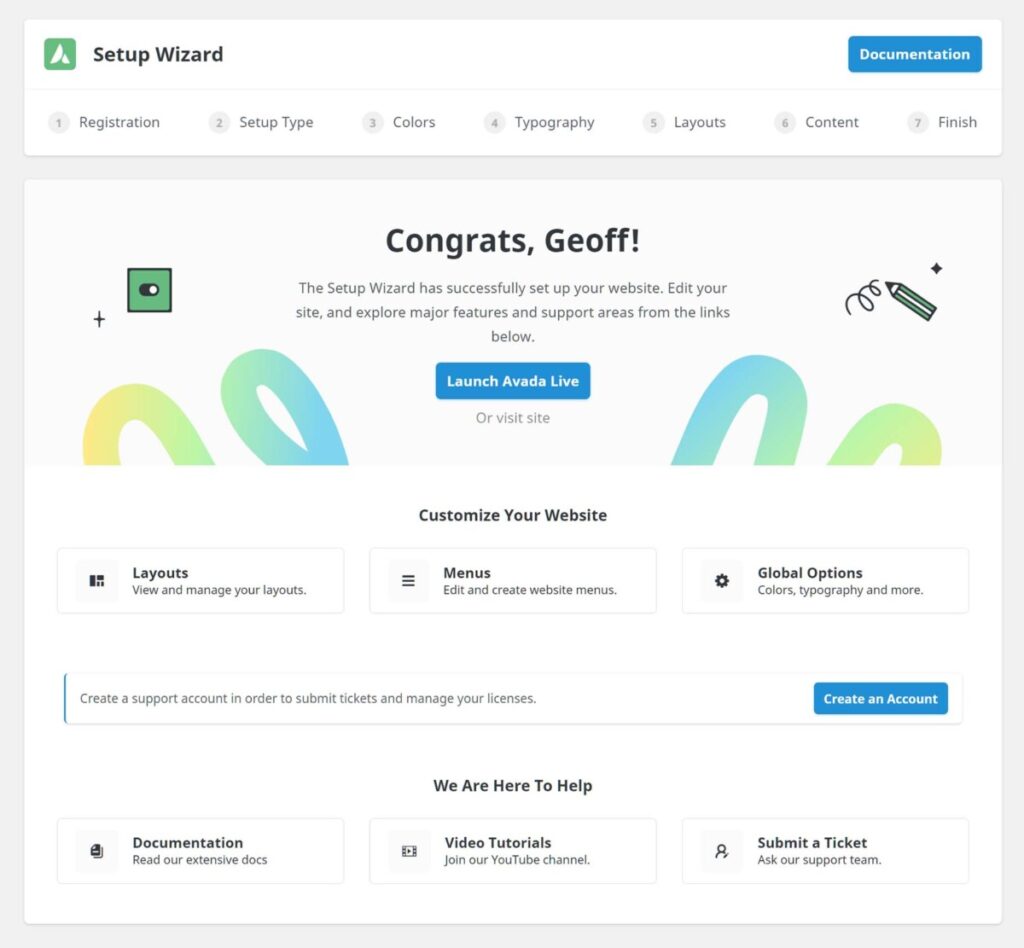
After the Wizard completes its tasks, you are redirected to the Setup Wizard page, which offers links to edit your site, manage layouts, menus, and global options, set up a support account, and read Avada documentation.
Conclusion
Avada is one of the most versatile and best WordPress themes that is suitable for a wide range of business needs. One of its most notable features is its versatility, which allows users to create any design or layout without the need to write code. We’ve explained how to install and Setup Avada theme WordPress. We truly hope it was beneficial to you.
How to Install and Setup Avada Theme WordPress: FAQs
Does the Avada Theme support responsive design?
Yes, the Avada Theme is fully responsive, which means it works perfectly on a variety of screen sizes and devices, including computers, tablets, and smartphones.
Does the Avada Theme support third-party plugins?
Yes, the Avada Theme is compatible with a wide range of third-party plugins, allowing you to extend its functionality and add additional features to your website.
Is the Avada Theme SEO-friendly?
Yes, the Avada Theme is designed with SEO best practices in mind, including clean code, fast loading times, and support for popular SEO plugins, helping to improve your website’s visibility and search engine rankings.