In today’s online environment, every second matters. Slow-loading websites annoy users while also affecting search engine rankings and conversions. That’s where WordPress Rocket comes in. WP Rocket Plugin stands out as a great caching plugin, renowned for its user-friendly interface, powerful features, and exceptional results. Due to its amazing features, it is the best WordPress performance plugin.
In this post, we’ll look at how How to Setup WP Rocket Plugin and give a smooth surfing experience for your users.
Table of Contents
What is the WP Rocket Plugin?
WP Rocket Plugin is a caching plugin that improves website speed and performance. WP Rocket, created by WP Media, has several features targeted at increasing page load times, server response times, and overall user experience.

It enables you to provide blazing-fast loading times, which leads to a better user experience, increased engagement, and higher search engine rankings. WP Rocket provides users with fast page loading and easy navigation by dynamically caching static information and optimizing various website features.
How to Install WP Rocket Plugin?
Visit the WP Rocket website, select a pricing plan that meets your needs, and then buy the plugin. After purchasing, download the plugin files to your computer.

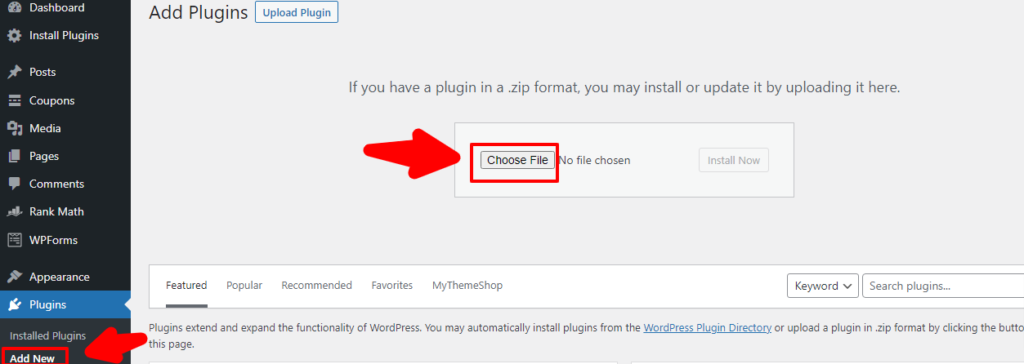
Log into your WordPress dashboard, go to the “Plugins” section, and click “Add New.” and “Choose File“.
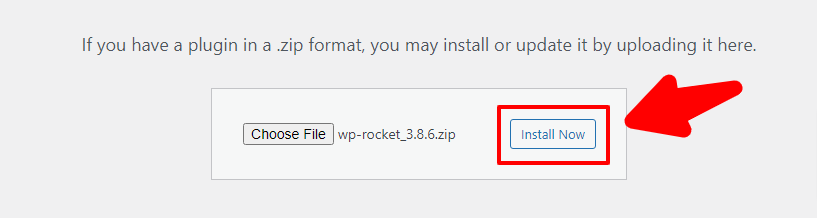
Click on the “Install Now“.
Activate the WP Rocket Wordpress plugin zip file to your website.

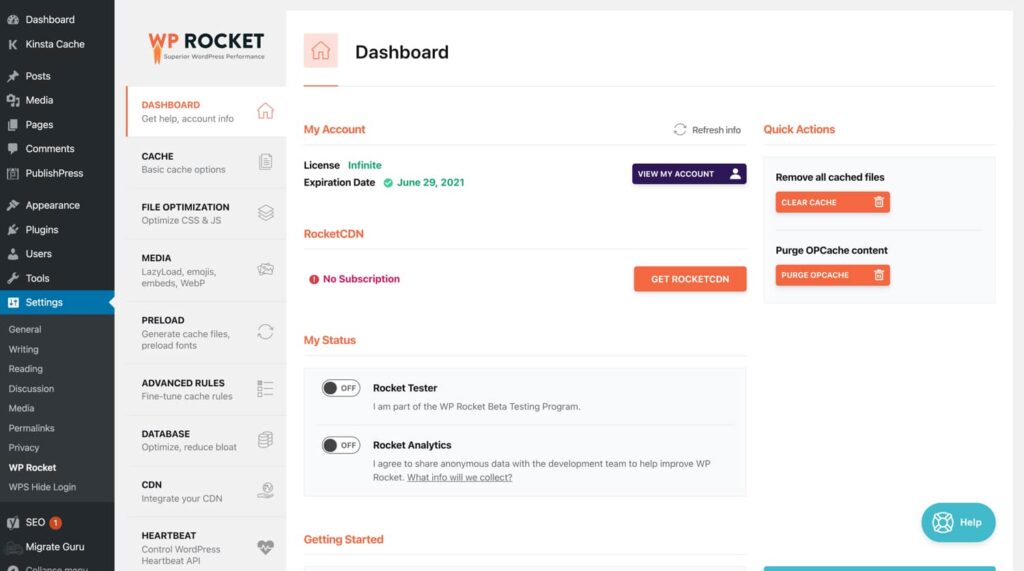
How to Setup WP Rocket Plugin?
Once you’ve installed and activated WP Rocket, the following features will be instantly launched:
- Page and browser caching
- Web fonts Cross-Origin support
- GZIP compression
Go to the settings panel.
To properly configure the WP Rocket plugin, follow these steps in order.
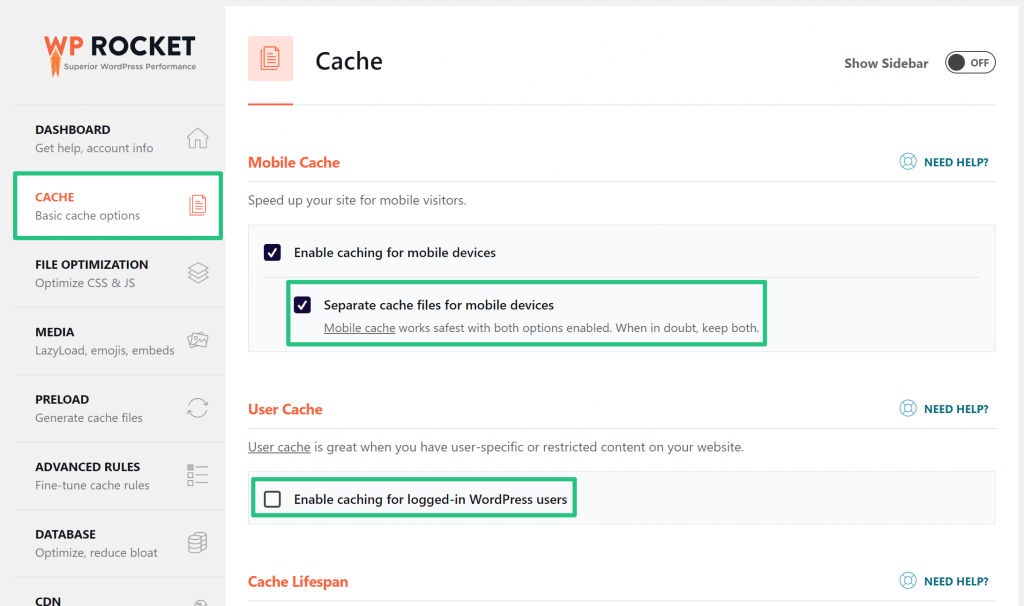
Cache
The first tab after the Dashboard is Cache. However, this tab requires very little setting. You should enable the “Separate cache files for mobile devices” option under Mobile Cache.
If your website has a registration function or user-specific content, you should also set the “Enable caching for logged-in WordPress users” option in User Cache.
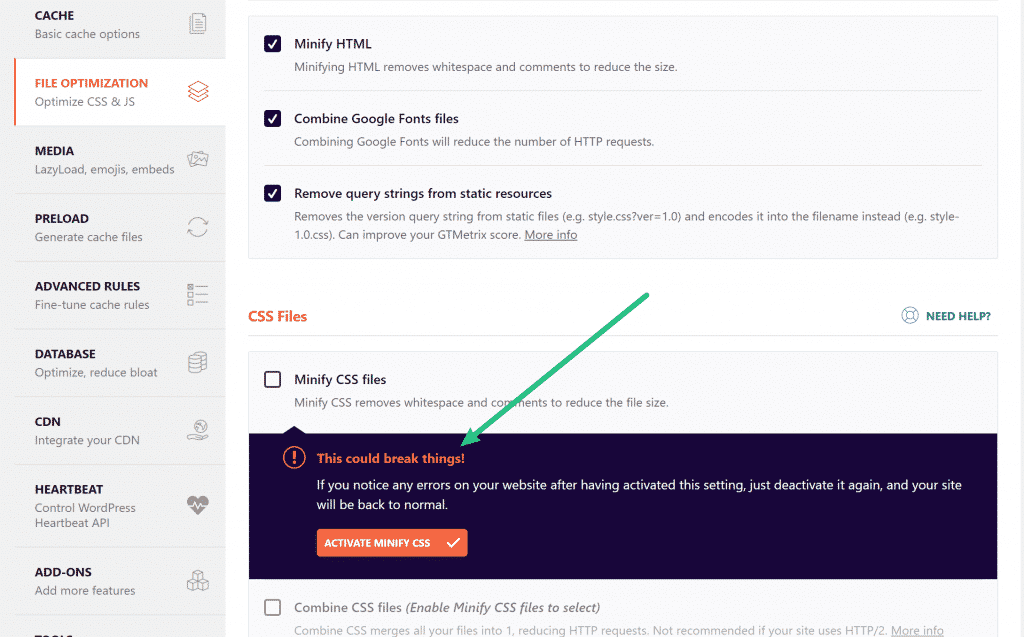
FILE OPTIMIZATION
File optimization allows you to combine and optimize HTML, CSS, and JavaScript files without affecting their functionality.
Keep in mind that the options under the File Optimization section are the most complicated, so don’t change any of the settings unless you’re an experienced developer.
When users manually customize File Optimization, something usually goes wrong, such as an invalid layout, links, or forms. WP Rocket’s documentation will assist you in resolving any issues with the File Optimization section.
Sometimes the plugin will warn you not to change the settings because it will somewhat affect the front-end of your site. If you see the This could break things! error, you can manually exclude files causing the issue.
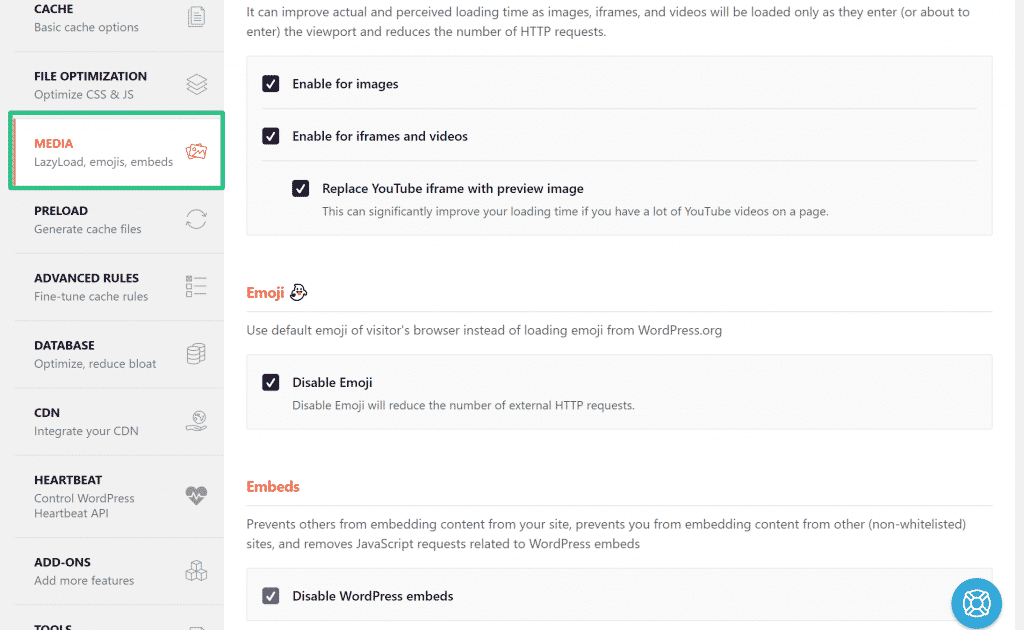
Media
The Media tab lets you manage lazy loading, Emoji, and WordPress embeds.
Lazy loading is a content optimization technique that greatly improves website loading time. The basic idea is to display content (such as images and videos) on the page only when visitors scroll down. This optimization strategy makes your website faster and more efficient.
We recommend that you enable all of the available features. Also, check the “Replace YouTube iframe with preview image” box to speed up your loading time even more.
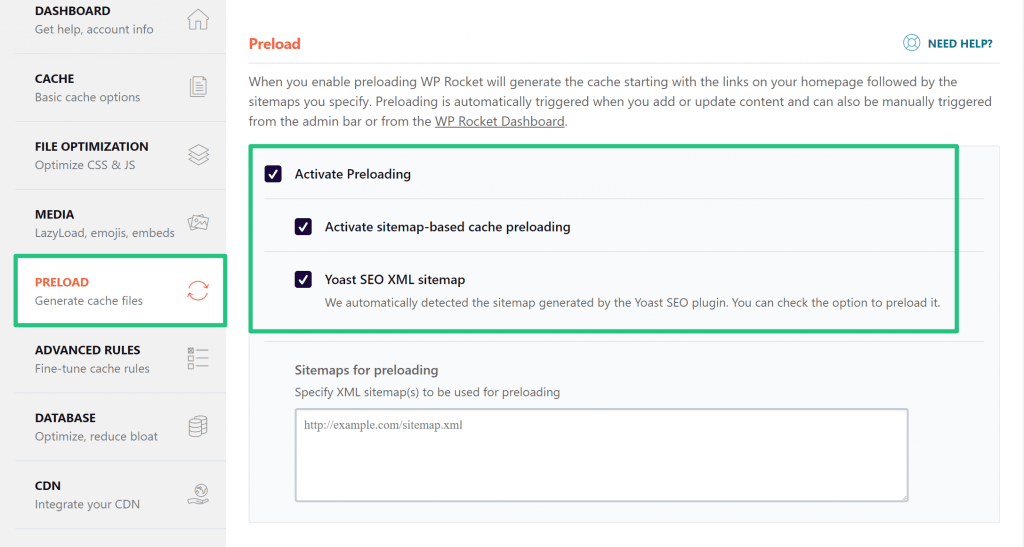
Preload
Typically, caching plugins wait for a website user to go to each page. The preload feature is critical for caching pages since, unlike other plugins, WP Rocket automatically builds cache first to serve cached pages later.
Enable the “Activate Sitemap-based cache preloading” option. Now, select your sitemap.
Scroll down to see Prefetch DNS Requests. If you’re using any third-party content, this is where you can include the URL. For example, you can connect Instagram, YouTube, LinkedIn, and Facebook and use Google fonts.
Advances Rules
You can exclude particular cookies, user agents, pages, etc. from being cached under the Advanced Rules tab.
Most of the time, you’d leave the Advances Rules as they are, since the plugin automatically detects plugins that need to be excluded from caching. If you want to exclude something specific (such as your shopping cart page), you can do so using Advanced Rules.

Database
Moving down, you’ll see the Database tab. This is where you may clear your WordPress database of everything unnecessary.
Make a backup of your website before checking any boxes! You will be able to remove any unnecessary post changes, spam comments, transients, etc. You can also set up an automatic cleanup schedule so that your plugin runs on its own.

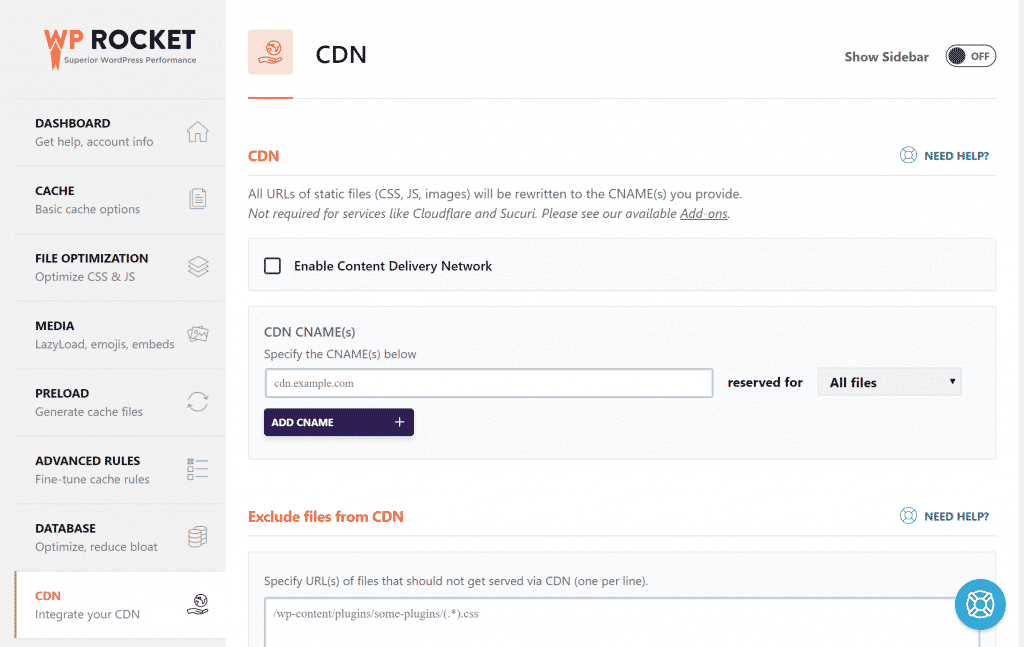
CDN
The CDN allows you to modify your website’s URLs so that content is served from your CDN instead. If you don’t use CDN, you can skip the configuration in this part.
For example, instead of loading photos from your media library, you can use WP Rocket to load images from a CDN version.
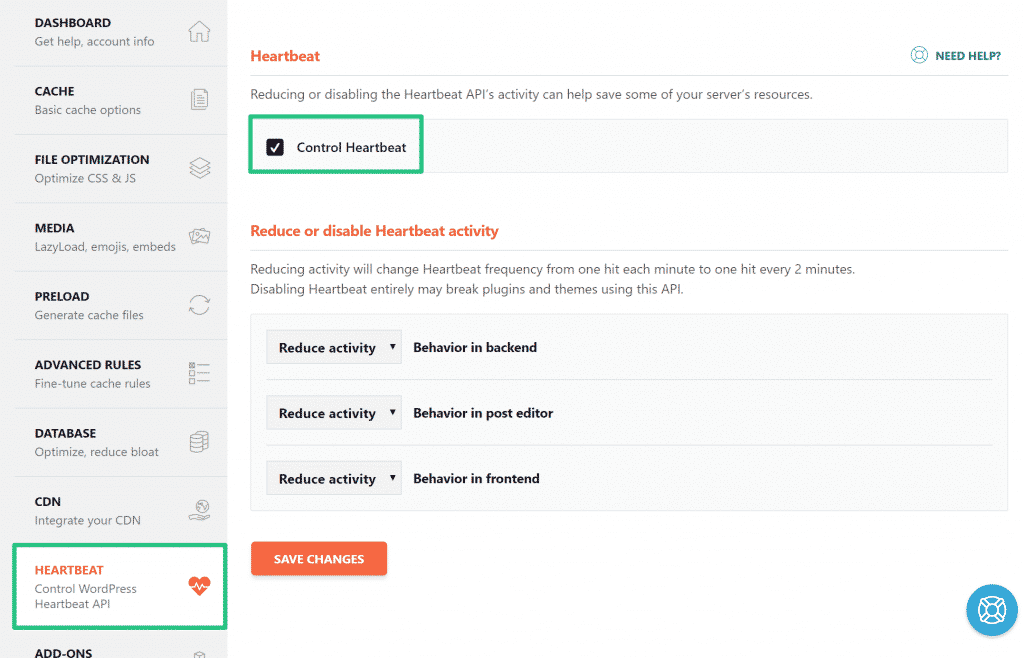
Heartbeat
The Heartbeat section aims to improve the dashboard’s functionality. It allows for various important functions, such as auto-saving the editor and user session management.
You can enable the “Control Heartbeat” option to save some server resources.
It’s better to leave other the Reduce or disable Heartbeat activity settings unless you’d like to specifically disable the Heartbeat API.
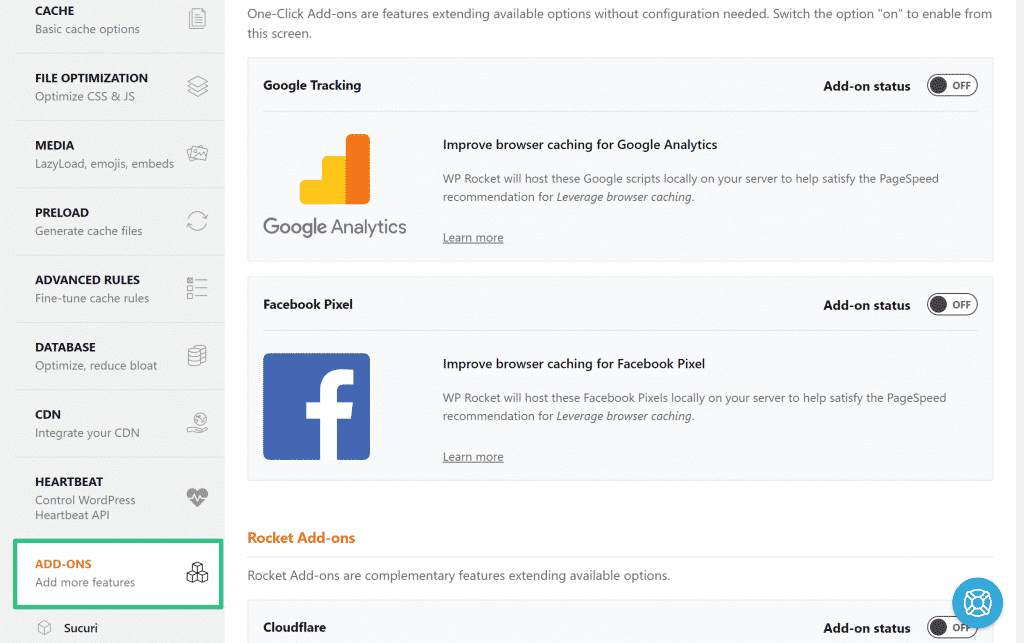
add-ons
WP Rocket offers add-ons for Sucuri, Facebook Pixel, Google Analytics, and Cloudflare.
If you’re using Google Analytics or Facebook Pixel, WP Rocket’s add-ons let you host the tracking scripts locally rather than loading them from Google or Facebook.
For Sucuri or Cloudflare, you’ll discover useful features, like clearing those servers’ cache whenever you clear cache at WP Rocket.
To enable any of these features, simply turn on the related add-on.
Conclusion
WP Rocket sets the road for unprecedented online success by improving user experience, engagement, and search engine visibility. WP Rocket Plugin provides a comprehensive solution for boosting website speed and performance, allowing you to provide a smooth surfing experience to your audience.
We hope that this article helps you figure out how to correctly install and setup the WP Rocket plugin in WordPress.
FAQs
Can I use wp rocket with other caching plugins?
Using WP Rocket alongside other caching plugins is not suggested because this can cause conflicts and slow down performance. wp rocket wordpress plugin is designed to work independently and provide extensive caching solutions without using extra plugins.
Does wp rocket wordpress plugin work with Woocommerce?
Yes, wp rocket wordpress plugin is fully compatible with WooCommerce, WordPress’ top e-commerce platform. It efficiently caches product, cart, and checkout pages, providing customers with fast loading times and a smooth shopping experience.
Is wp rocket wordpress plugin suitable for beginners?
Absolutely! WP Rocket’s user-friendly UI and intuitive settings suit users of all skill levels. Whether you’re a new WordPress user or a seasoned developer, WP Rocket’s simple setup and configuration choices make it easy to optimize website speed.