As online threats get harder to detect, it’s critical to understand the various types of malware that can attack your WordPress website. Wordfence is a robust solution, providing a strong defense against future attacks. This article will discuss the installation method, and how to setup WordFence Plugin in wordpress to secure your WordPress site.
Table of Contents
What is the WordFence Security Plugin?

Wordfence Security Plugin is a popular, highly customizable and feature-rich WordPress security plugin that offers a variety of functions to help protect websites from viruses and attacks. It is the only plugin that checks all files, comments, and posts for URLs on Google’s Safe Browsing list. Wordfence just released Wordfence CLI, a high-performance command-line malware scanner that uses a large number of malware detection signatures to scan file systems.
How to Install WordFence Plugin in WordPress?
Follow these simple steps to initiate Wordfence Malware Scanner to secure/scan your website:
Step 1: Activate the plugin on your WordPress dashboard
Install the plugin from your WordPress admin interface.
Go to the Plugins > Add New menu and type “Wordfence” in the search bar:
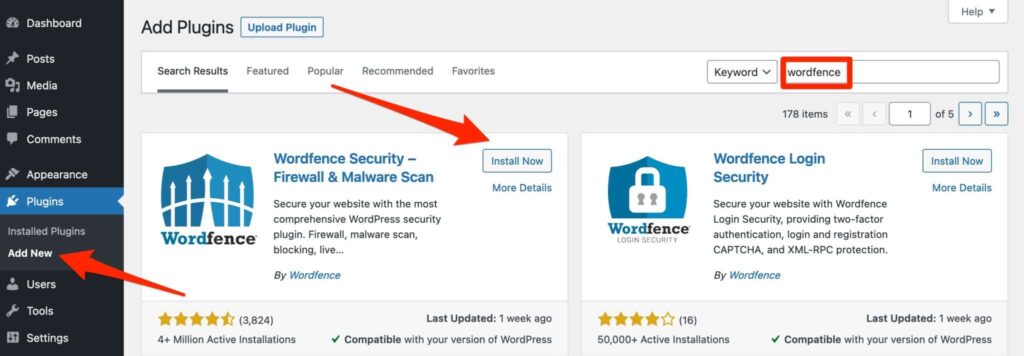
Once installed, activate the plugin.
Step 2: Get a Wordfence license key
After activation, a window will pop up asking you to get a Wordfence license. This step is required to get all the options in the free plugin.
Click on the “Get your Wordfence license” button:

You will be redirected to the Wordfence pricing page on the official website. Click on the “Get a free license” button to get a key for the free version of the plugin:
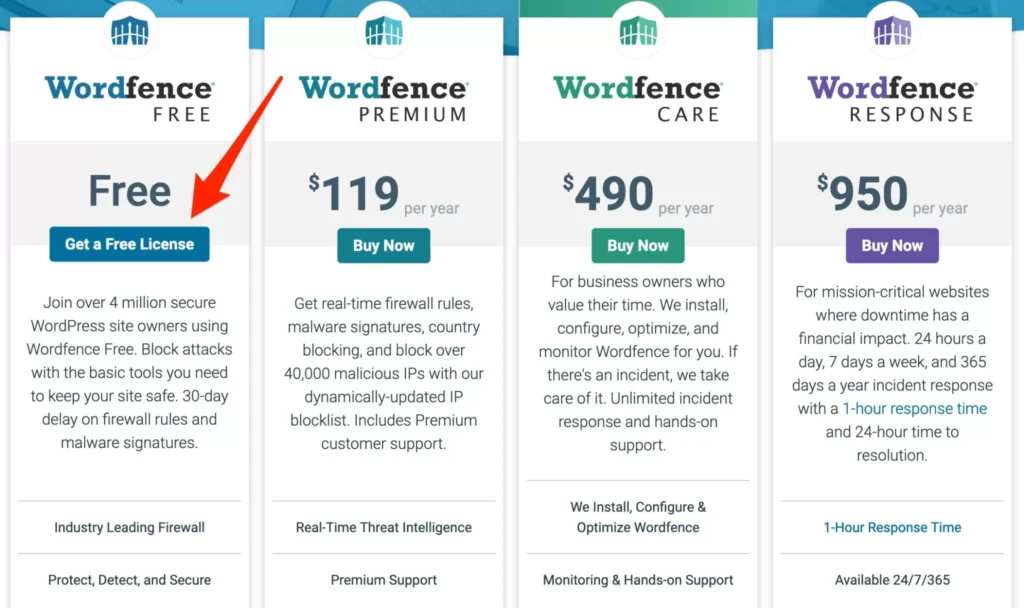
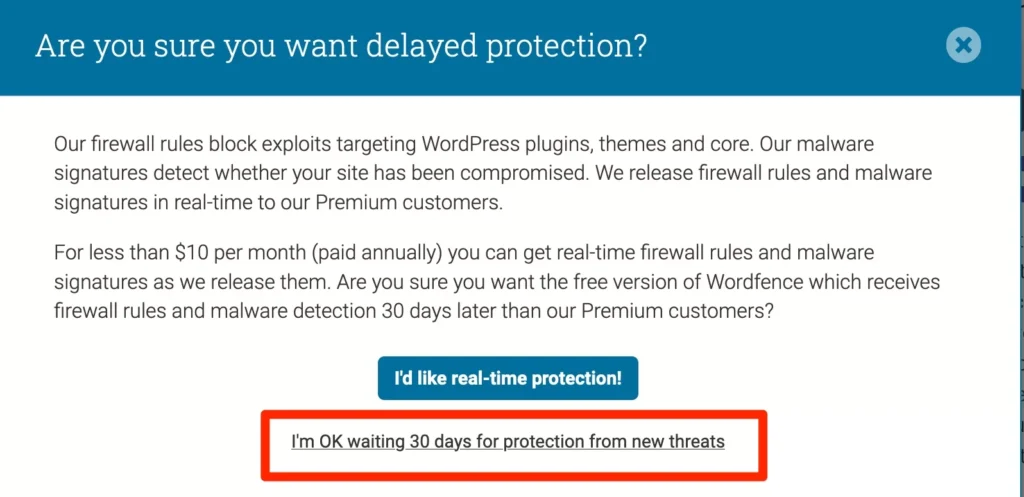
A new window opens on your screen to confirm if you want to use its free version and explains the main advantage of its premium version.
Click on “I’m OK waiting 30 days for protection from new threats” to use free version:
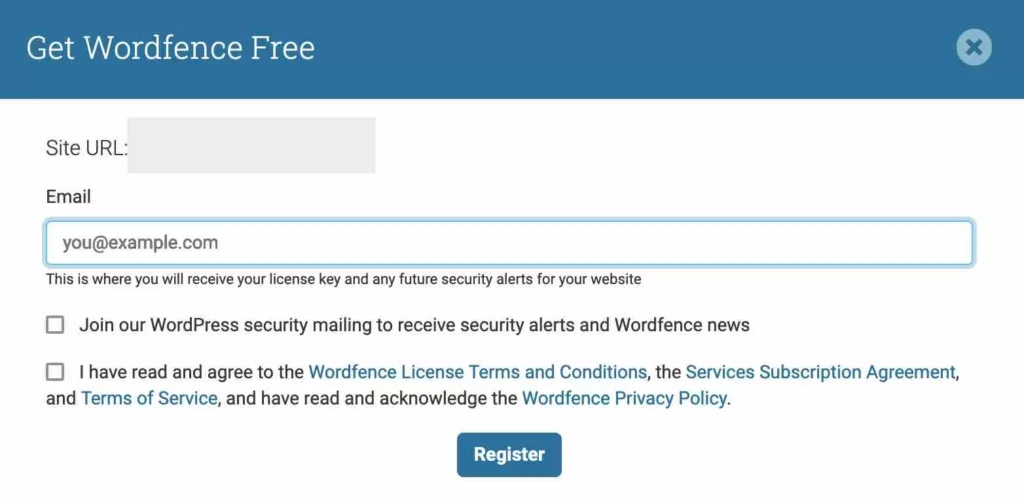
In the next window, enter your email address, check the boxes, and click on “Register”:
Step 3: Install your license on WordPress
Check your email box. You should have received an email from WordFence containing the license key to activate the plugin manually, WordFence also offers automatic activation. To do this, click the “Install My License Automatically” button.
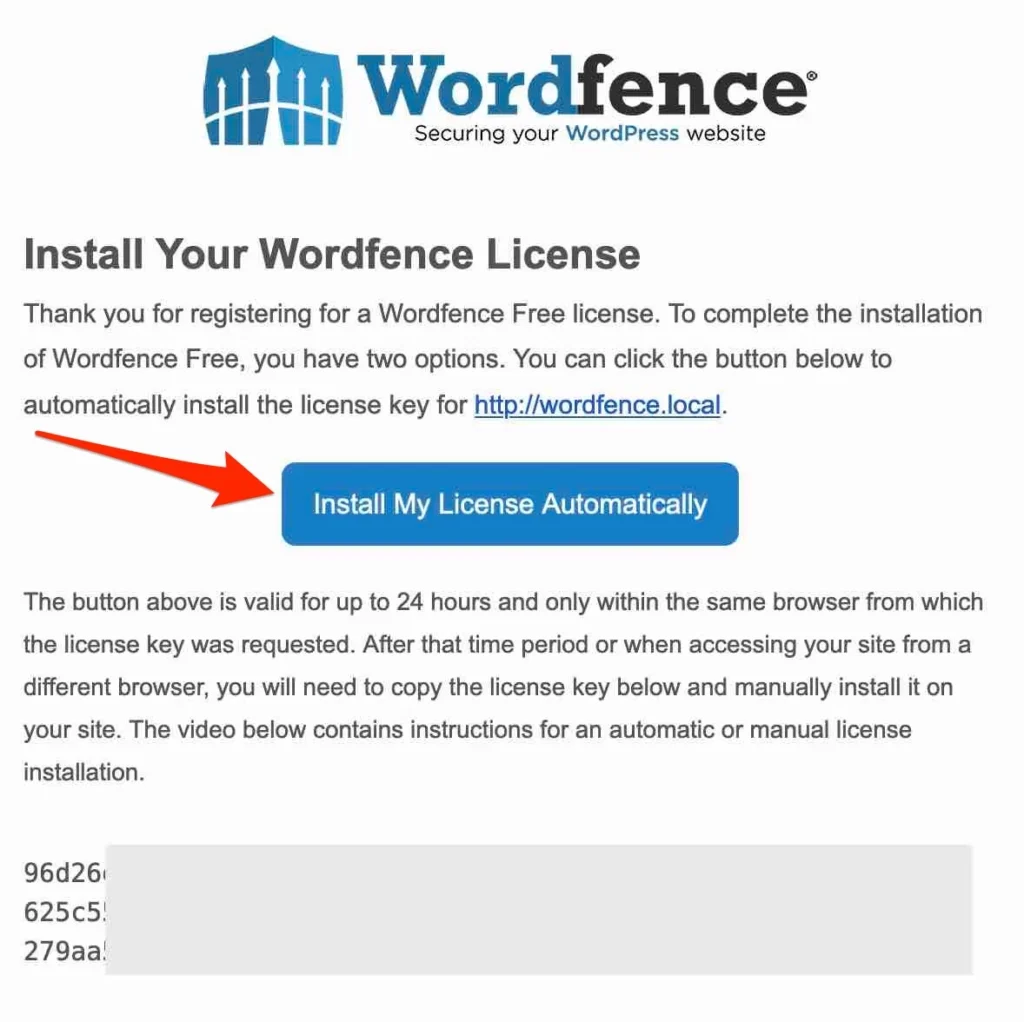
You will be redirected to your WordPress dashboard, with the “Email” and “License key” fields already filled in. Finish by clicking on “Install License.”
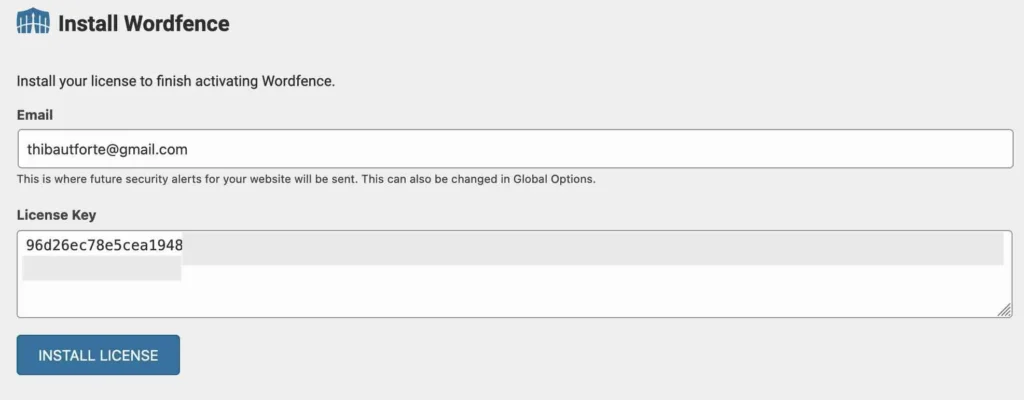
How to Setup WordFence Plugin in wordpress
Access the Plugin Dashboard
On the left-hand admin panel, click on Wordfence and select the Dashboard option. This will pull up the plugin’s main settings page. The dashboard contains all the information, including the last scan, malware blocked, IP addresses blocked, etc.
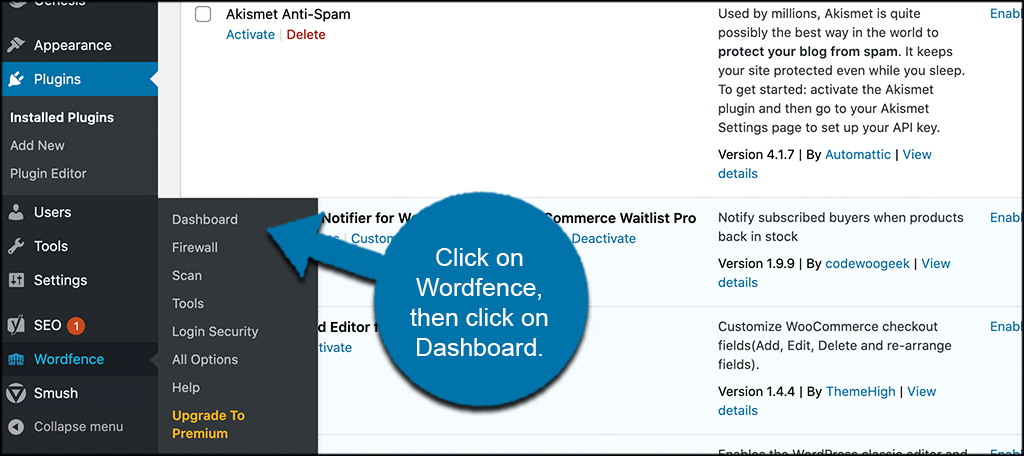
Configure Dashboard Options
You can also set up the global options for the Wordfence plugin. Simply click on the “Global Options” tab to open settings.
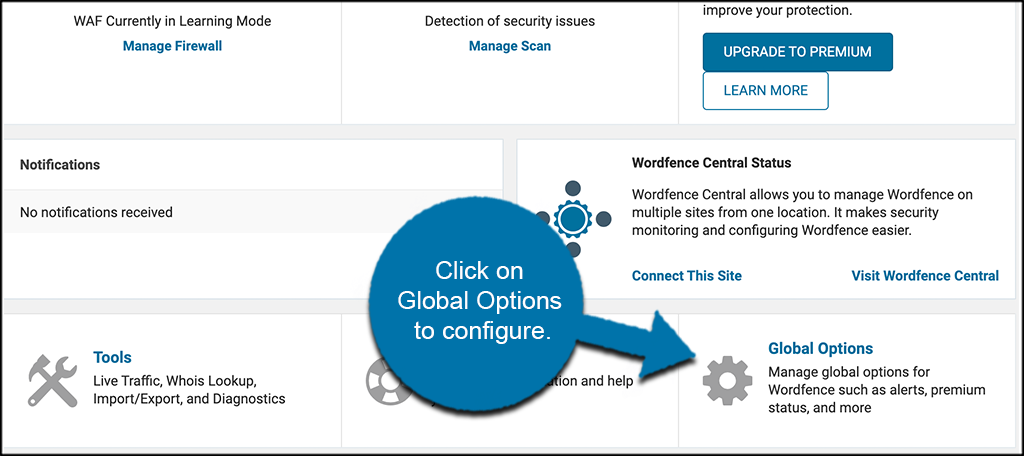
Go ahead and configure settings according to your website requirements.
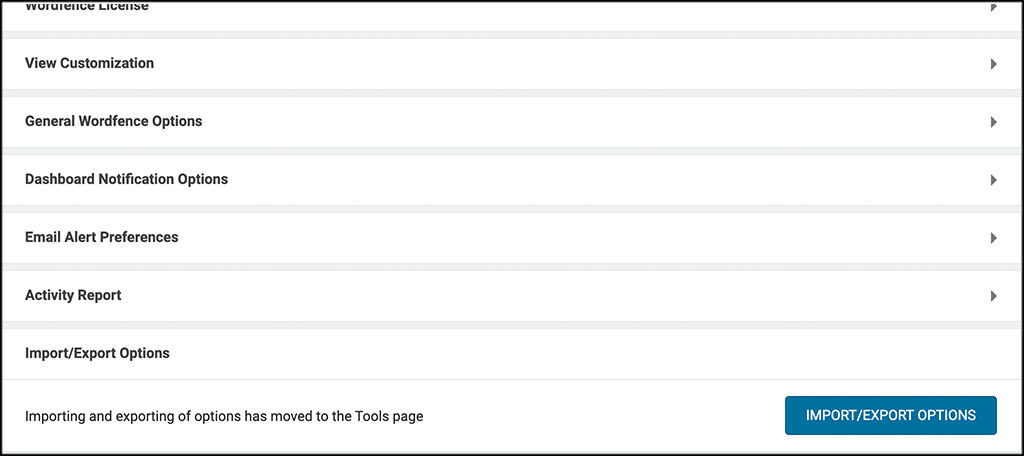
View the Firewall Option
Configure “Firewall”, you can find the settings under the main “Wordfence” tab in the menu section on the left.
You can manage all the IP addresses you’ve chosen to block and change your blocking preferences on the page.
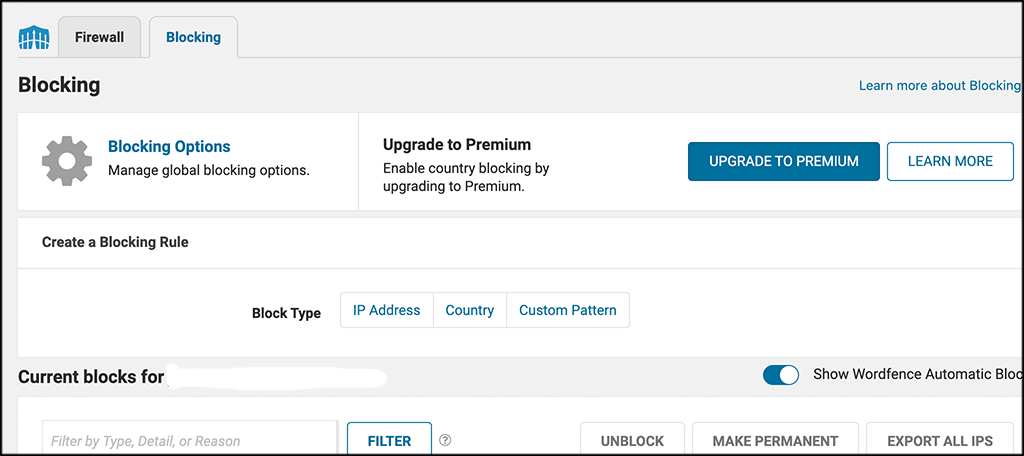
Click the “Firewall” option to adjust your settings.
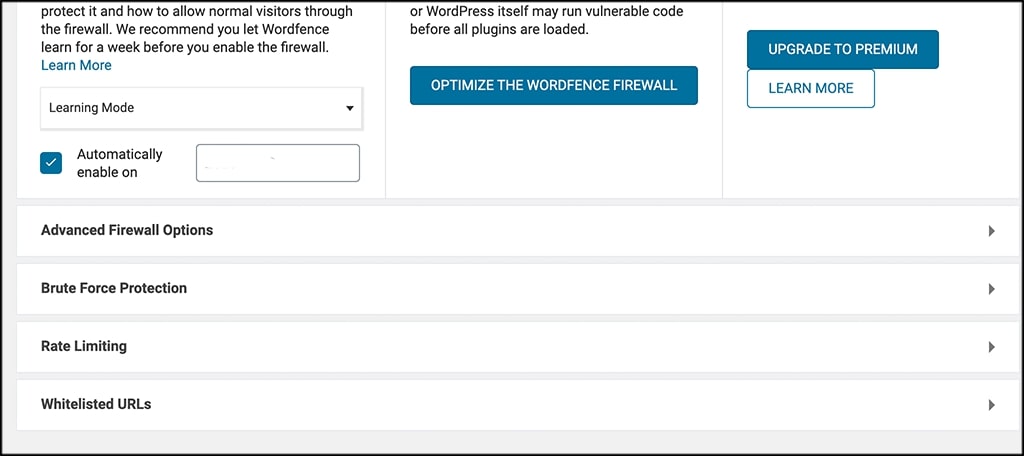
Optimize the Wordfence Firewall
There is a button named “Optimize the Wordfence Firewall” under the Firewall section. This is an important part of the setup process.
The firewall is the most important component of this safety plugin. It will prevent most of the malicious activity on your website.
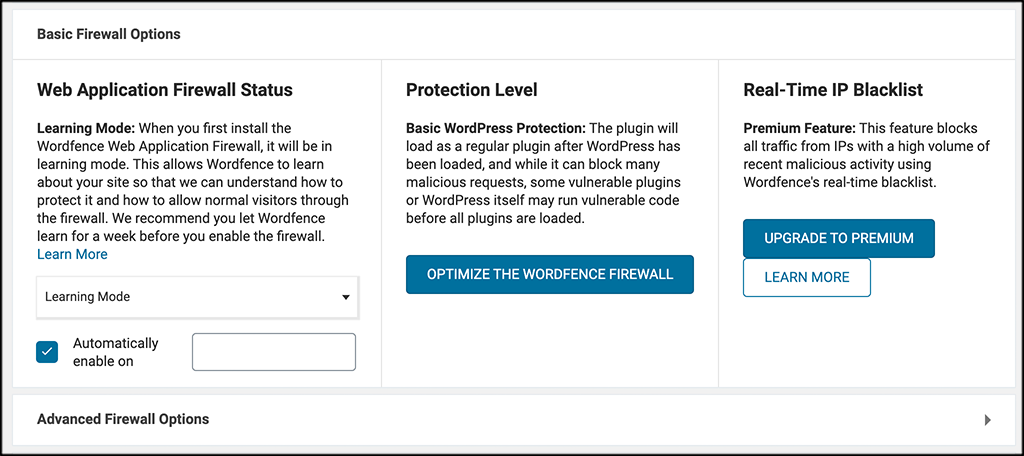
There will be a pop-up window with some information. The system will run a test to determine the best settings to use.
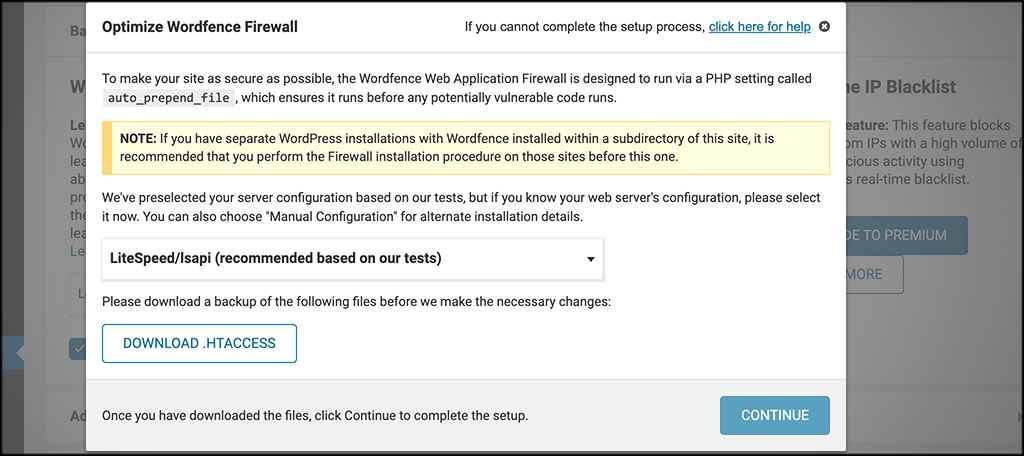
Click on “Continue” after you download the .htaccess file. This will complete the process, and changes will have taken place.
Set Up Two-Factor Authentication
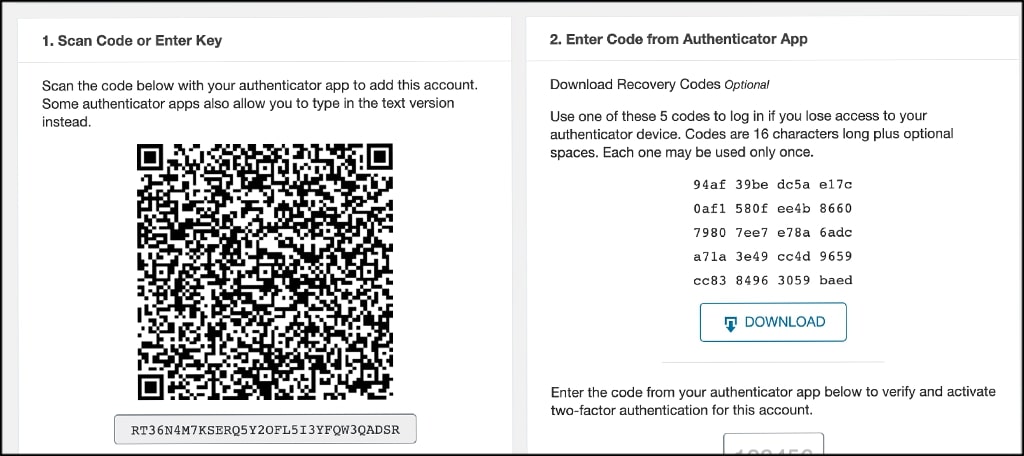
For extra login security, Wordfence has the option to enable two-factor authentication. Click on the “Login Security” to configure 2FA.
Perform a Scan When Needed
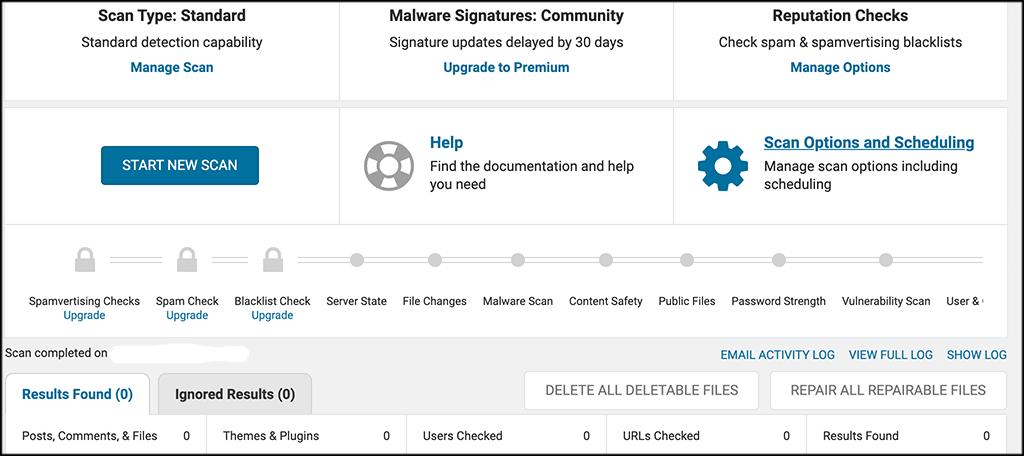
You can explore all other settings to secure your website or click on the “Scan” option to perform a scan of your site at any time.
Congratulations, you have successfully installed and set up the Wordfence Security plugin.
Conclusion
The WordFence Security Plugin provides a powerful security solution for websites built with WordPress. It provides a strong defense against various cyber threats, such as malware scanning, firewall protection, and login attempt monitoring. We hope this article helped you learn how to install and properly setup Wordfence on your website.
FAQs
How safe is Wordfence?
It is a reliable security plugin that offers a high level of protection for websites. The scanner feature is generally useful and provides protection. The firewall is regularly updated and provides effective protection against harmful attacks.
How does the Wordfence firewall work?
Wordfence’s firewall works as a web application firewall (WAF), evaluating web traffic and blocking harmful activity before it reaches your website. It helps to prevent security threats.
Can I use Wordfence with other security plugins?
Wordfence is a complete security solution; using different security plugins simultaneously may cause issues. To avoid problems, using only one powerful security plugin is recommended.
Does Wordfence provide customer support?
Wordfence offers customer care to both free and premium users. Premium members receive priority service, and there is also a community forum where people may ask questions and exchange information.


