In today’s digital world, engaging your audience and collecting useful data is necessary for success, and WPForms can help you accomplish just that. In this comprehensive guide, I will guide you through everything you need to know about how to use WPForms in wordpress, and how to create a contact form.
Table of Contents
What is WPForms Plugin?
WPForms is a drag-and-drop form WordPress builder plugin that allows users of all skill levels to easily create forms. WPForms has a wide range of functionality to meet various requirements from simple contact forms to complicated surveys and payment forms.
How to Install WPForms Plugin?
You’ll get step-by-step guidance on “How to Install Wpforms”
Step 1: Log in to your WordPress Dashboard
First and foremost, log into your WordPress dashboard using your admin credentials. Once logged in, you’ll see the familiar WordPress interface.
Step 2: Go to the Plugins Page
Next, go to the “Plugins” area on the left side menu.
Step 3: Click “Add New”
Once on the plugins page, click the “Add New” button at the top.
Step 4: Search for Wpforms
Type “WPForms” into the search bar in the upper right corner of the page and press Enter. The WPForms plugin should be the first result.
Step 5: Install the Plugin
Click the “Install Now” button. WordPress will automatically download and install the plugin on your website. This process often takes only a few seconds.
Step 6: Activate Wpforms
To activate the WPForms plugin on your website, simply click the “Activate” button.
How to Create A Contact Form Using WPForms?
In this guide, you’ll come to know how to create a contact form in 5 steps:
Step 1: Plugin Activation
After the activation of WPForms, In your administration interface you will have a new menu called “WPForms”:
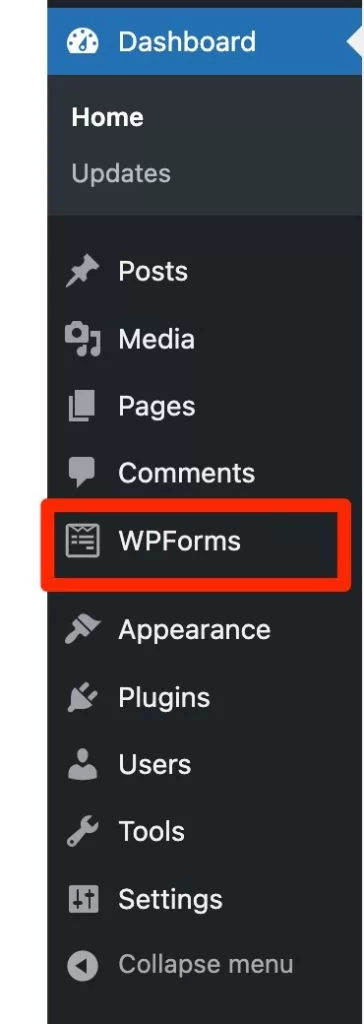
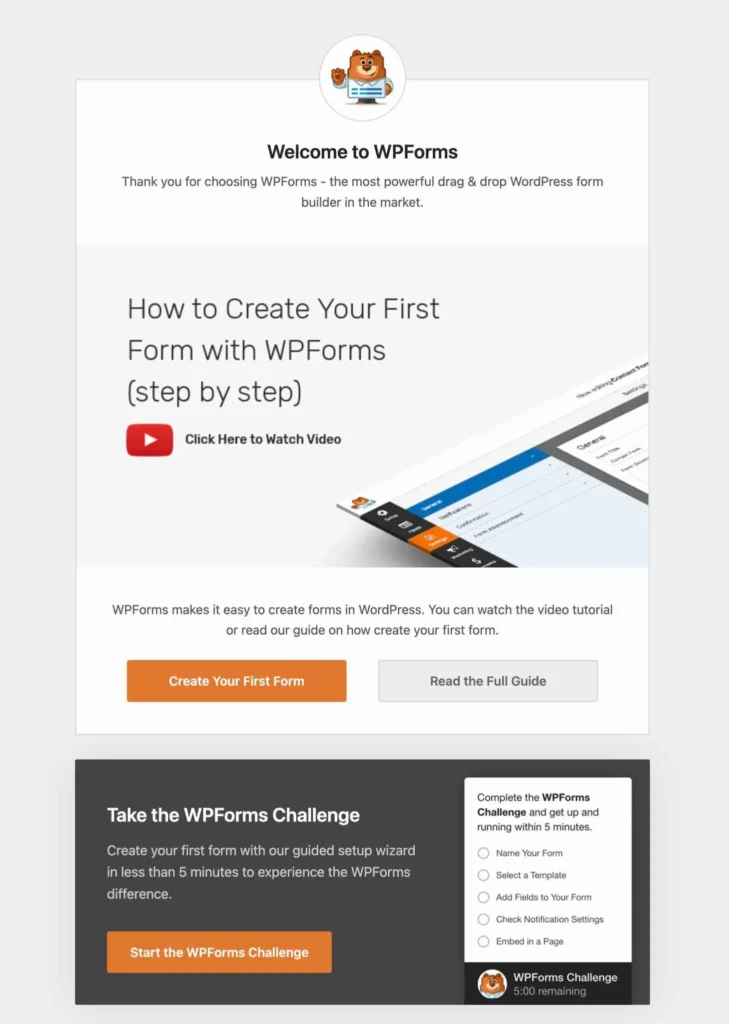
This is where you can create and customize your next forms. It offers you:
- Create your first form.
- Participate to the WPForms challenge: the plugin invites you to design your first form in less than 5 minutes.
- A video tutorial or read a guide on how to create a form.
Step 2: Select a form template
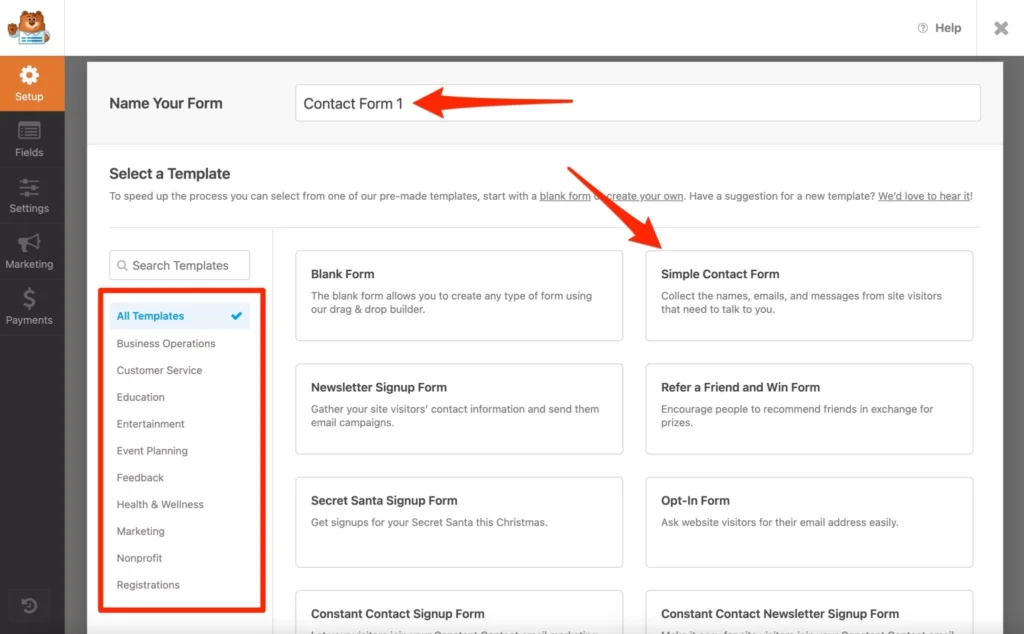
To add your first form, you can go through this landing page. WPForms will suggest two things:
- Name your form (e.g. Contact Form 1).
- Select a form template. You can filter by categories in the left column. In the free version, WPForms offers 25 different types of forms.
Step 3: Add fields to your form
After selecting the form you want template, WPForms sends you to the form customization interface.
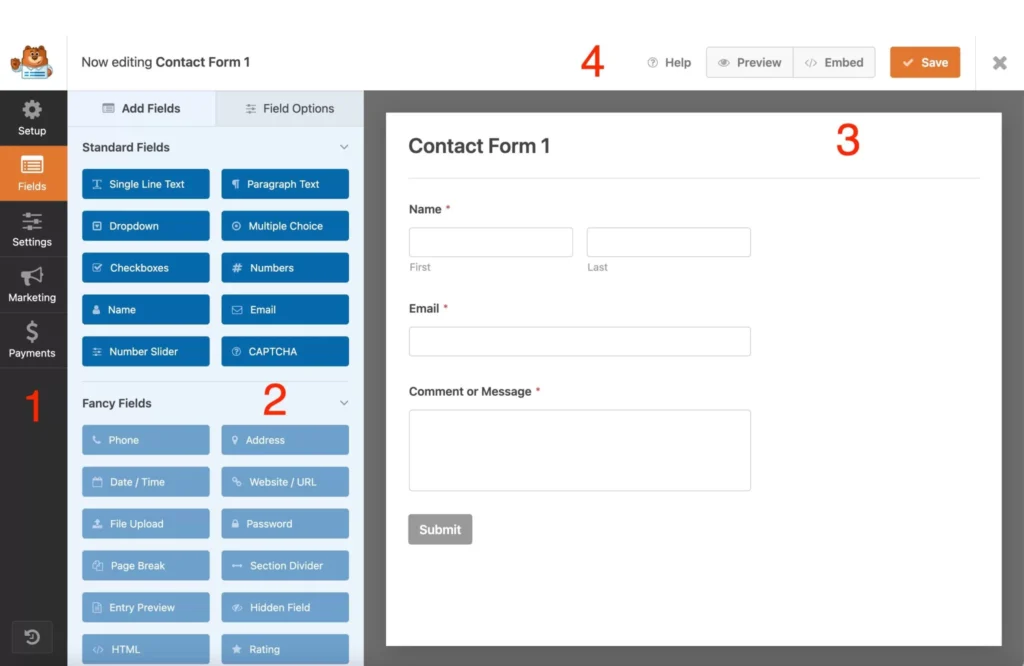
It is easy to understand and read. It can be divided into 4 areas.
- The left sidebar invites you to make general settings on your form (setup, fields, settings, marketing, payments).
- Right next to it, in blue (zone #2), you have two tabs to add fields to your form and customize them more finely (“Field Options” tab).
- In the middle of the screen (zone #3), you can see a preview of your form. All your changes (adding/modifying a field) are visible in real time.
- At the top of the page (zone #4), you have a bar to save, preview and embed your form into your content.
How to add and customize your form fields?
To add a field, simply select the one you want and drag & drop it to the preview of your form.
Drag and drop also allows you to change the order of all your fields and reposition them as you want.
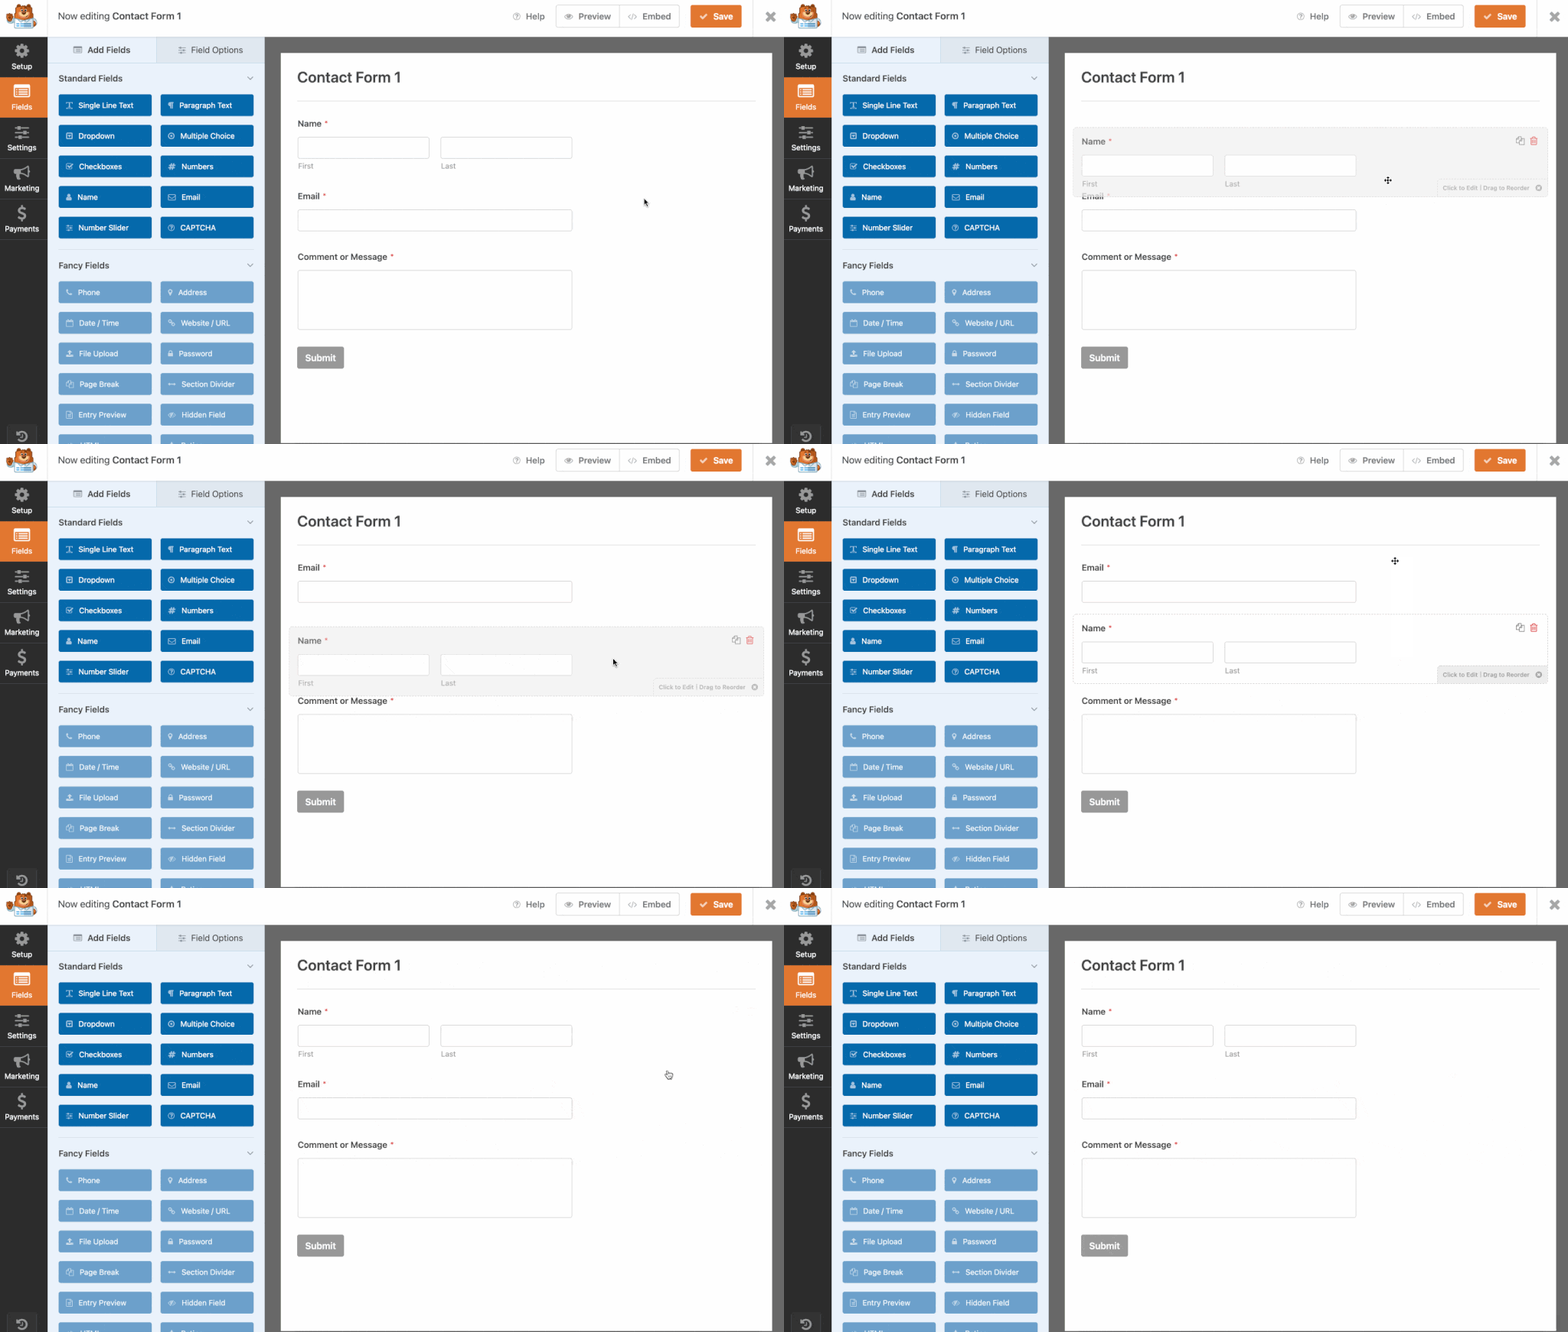
You can edit the field of your choosing with a simple click. WPForms then directs you to the “Field Options” menu, which contains three tabs:
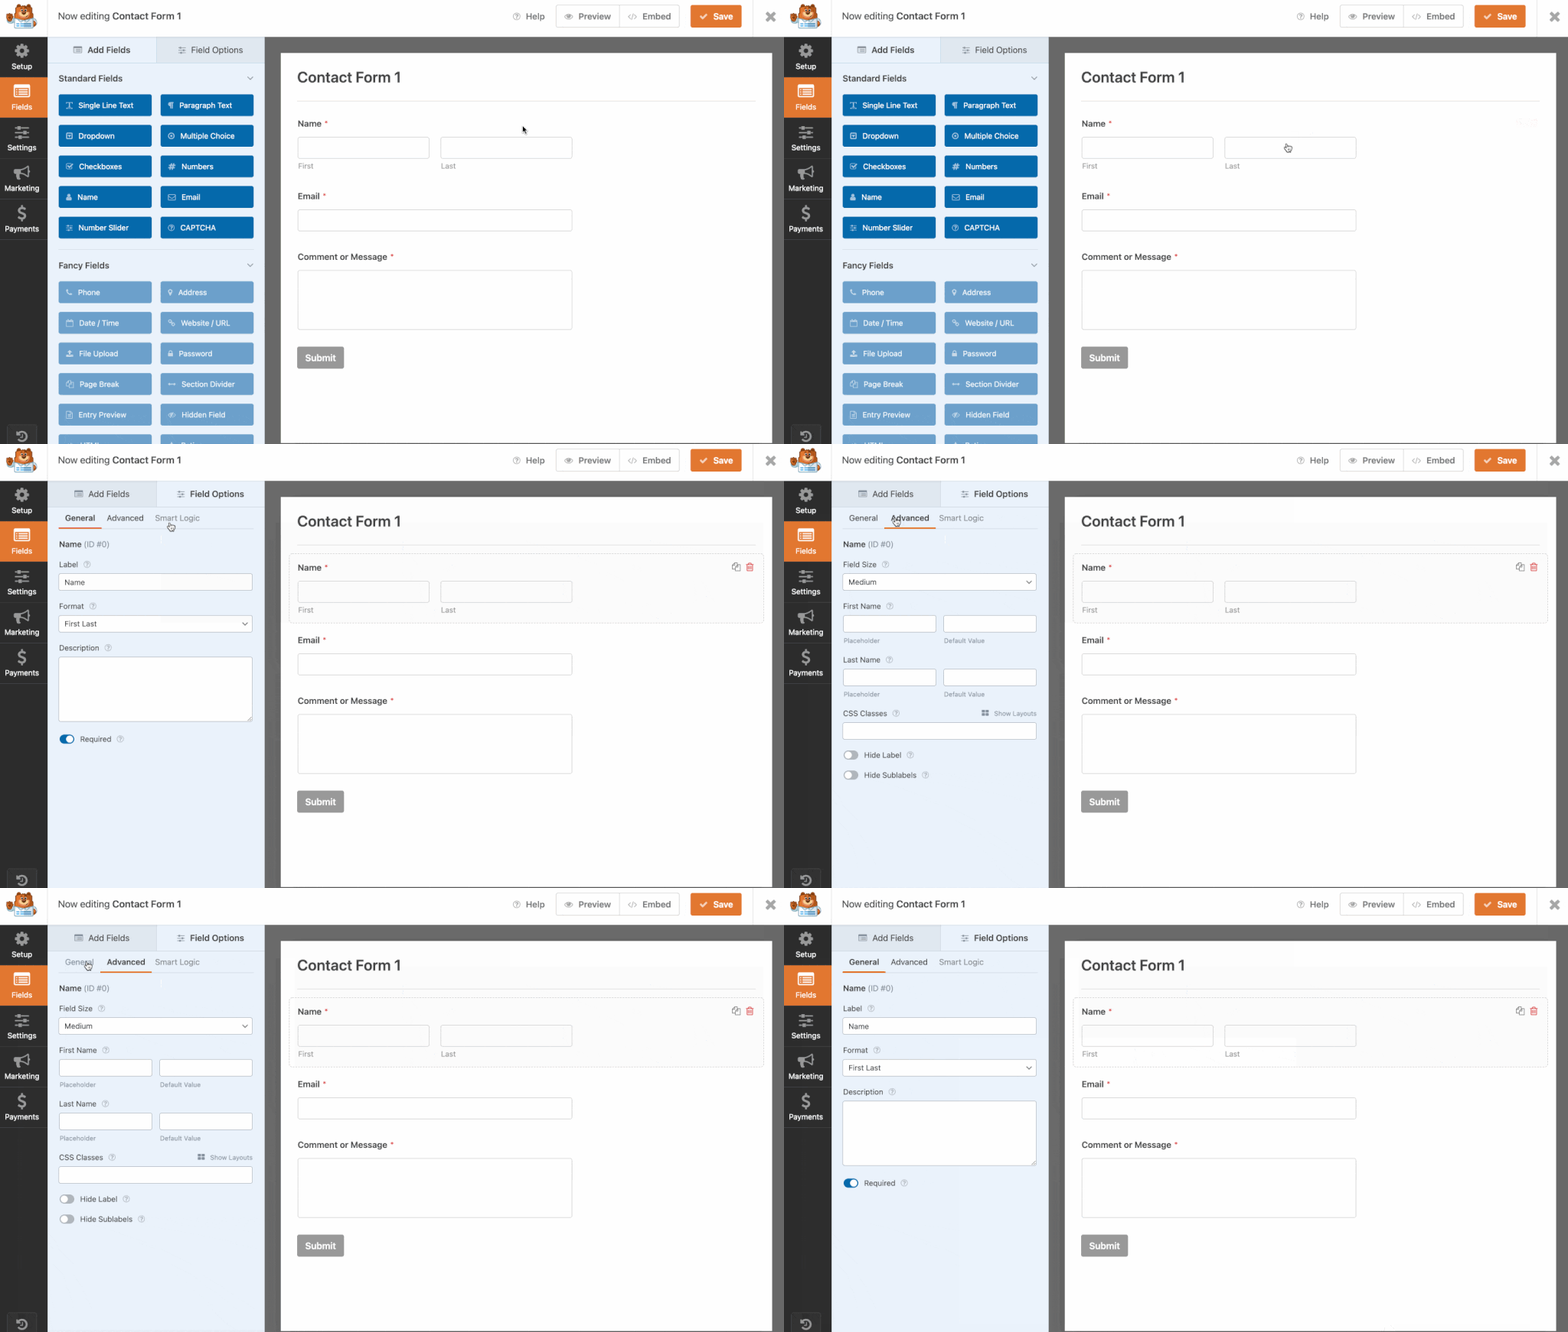
Step 4: Make adjustments to your form
There are still a few details to work out before you can proudly show your form to visitors. To do this, navigate to the “Settings” menu on your left sidebar:
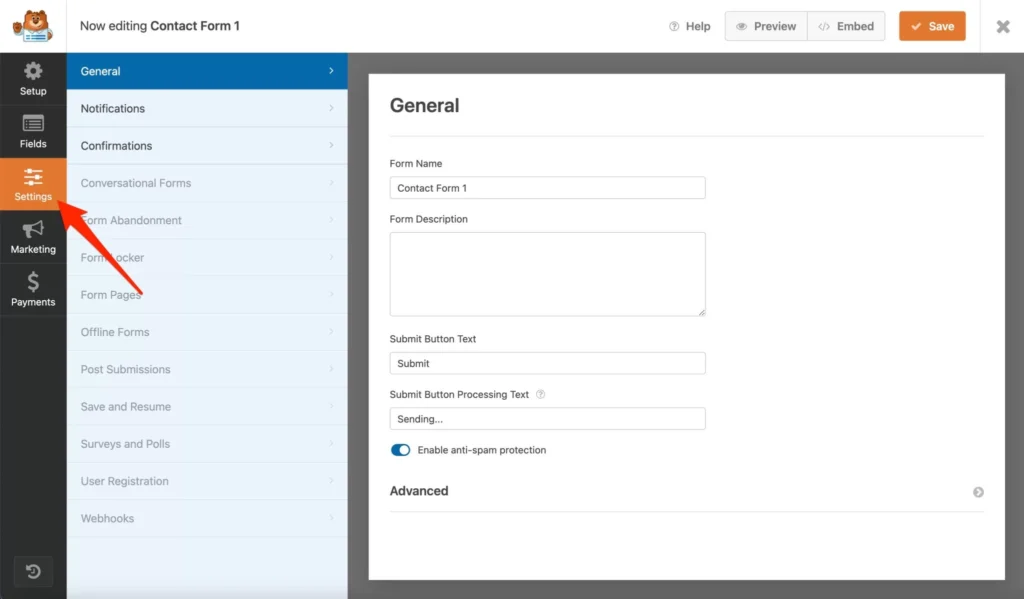
The free version of WPForms enables you to act on 3 levels:
- “General” to edit the text of the submit button. By default, “Submit” is proposed. Do the same process with the text of the current submit button. For example, Enter “Loading…” instead of “Sending…”.
- “Notifications” to set up email notifications for form submissions.
- “Confirmations” shows a short message after submitting a form (e.g., “Thank you for contacting us; we will respond as soon as possible”).
Once you’re done configuring your form’s settings, click on the Save button at the top of the screen to save your changes.
Step 5: Integrate the form into your WP content
The Last step in this process of creating Contact Form by WPForms is to integrate it into your WordPress site.
By clicking on the “Embed” button at the top of the page, WPForms will offer you to either select a page on which to integrate your form, or to create a new page.
That’s it! You now know how to create forms with WPForms.
Conclusion
In conclusion, WPForms is a must-have solution for WordPress users looking to improve the functionality and engagement of their websites. Its user-friendly interface, huge template library, and smooth connection options make it easier to create professional-looking forms. We hope this article guides you on how to Install WPForms and create a form using the WPForms plugin.
FAQs
Can I create complex forms with Wpforms?
Absolutely! WPForms provides advanced capabilities such as conditional logic and multi-page forms to meet complex form requirements.
Is Wpforms mobile responsive?
Yes, all forms built with WPForms are mobile responsive, giving the best user experience across all devices.
Where does WPForms store data?
WPForms makes it easy for you to view all your leads in one place to streamline your workflow. All your entries are stored in the WordPress database and are easily accessible inside your WordPress dashboard.


