Building a beautiful, responsive website can often feel overwhelming, but with Oxygen Page Builder for WordPress, it’s a breeze. Oxygen Page Builder gives you the power to create stunning, custom designs effortlessly. Imagine having complete control over every aspect of your site’s layout without coding—this is exactly what Oxygen offers. In this article, I’ll walk you through the simple steps to install and set up Oxygen Page Builder on your WordPress site, so you can start creating your dream website with confidence and ease. Let’s dive in and unleash your creativity together!
Oxygen Page Builder
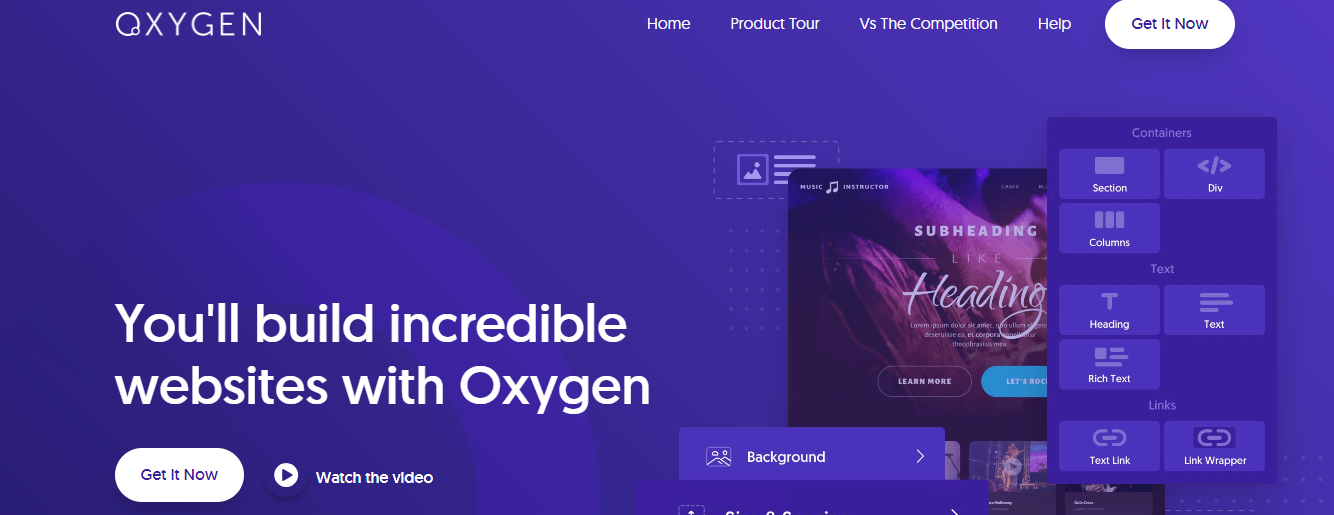
Oxygen Page Builder is a powerful and versatile visual website builder for WordPress that allows users to have complete control over the appearance and functioning of your site without the need for coding. Oxygen distinguishes itself with its speed optimization, ensuring that websites built with it load quickly and effectively. Oxygen Page Builder provides an extensive set of tools for designing visually appealing and highly functioning web pages.
How to Install Oxygen Page Builder?
- Visit the website purchase and download the plugin file.
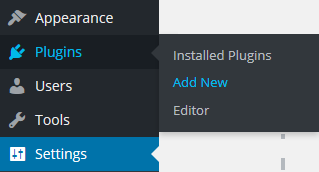
- Go to your WordPress dashboard and navigate to Plugins > Add New
- Click on the Upload Plugin and choose the downloaded zip file from your computer.
- Click Install Now and activate it.
How to use Oxygen Page Builder?
- After activating the plugin, a Welcome screen will appear, asking you to select your Oxygen installation type.
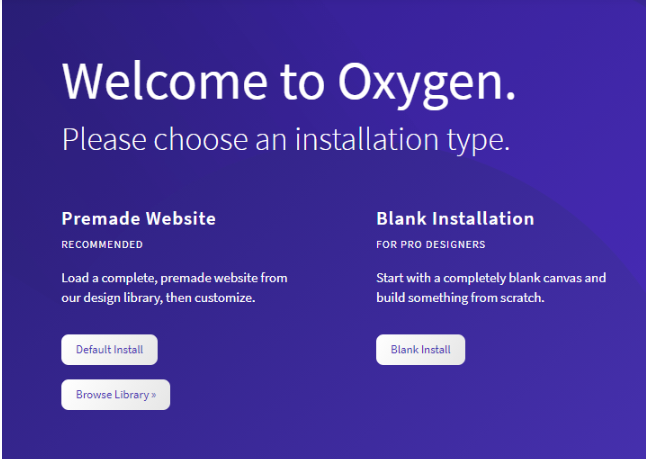
- Click the Default Install option to begin.
- The default option is to install the “Atomic” base site and import templates, stylesheets, and pages. You can also select a different base site by selecting Browse Library.
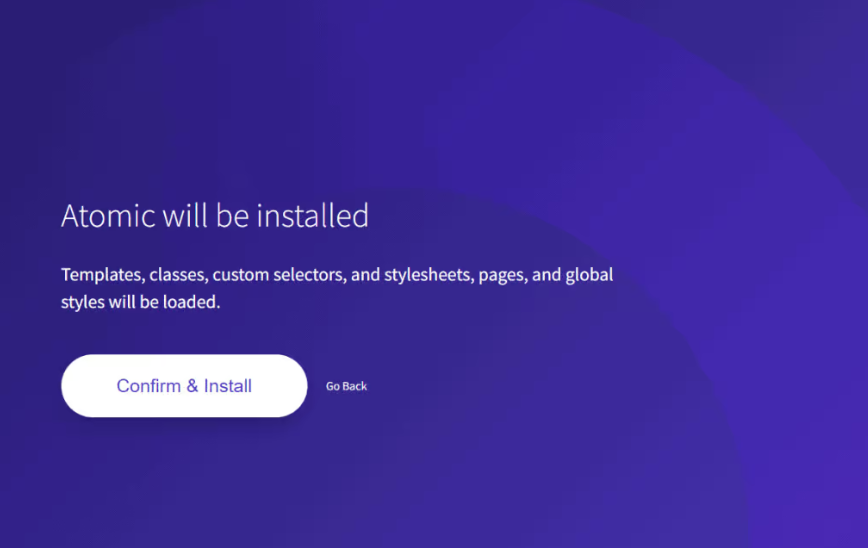
- Click Confirm & Install to proceed.
- Then click on Oxygen> Settings
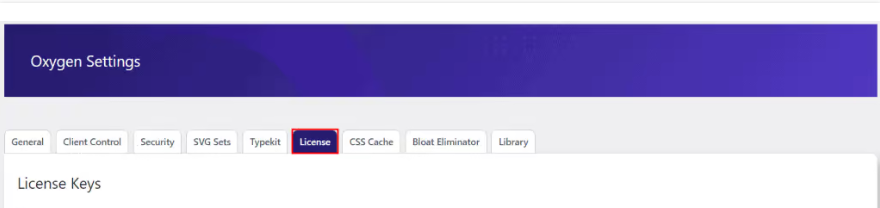
- A setting tab with some options will appear on your screen. Use these settings to set up your site according to your needs.
How to Edit a Page with Oxygen?
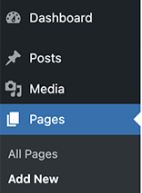
- Navigate to your WordPress Dashboard. Click on Page then Add New option.
- Create a page and publish it.
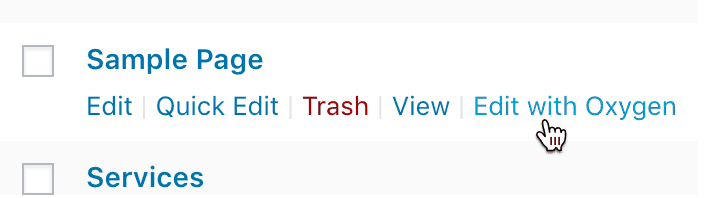
- Click on Edit with Oxygen.
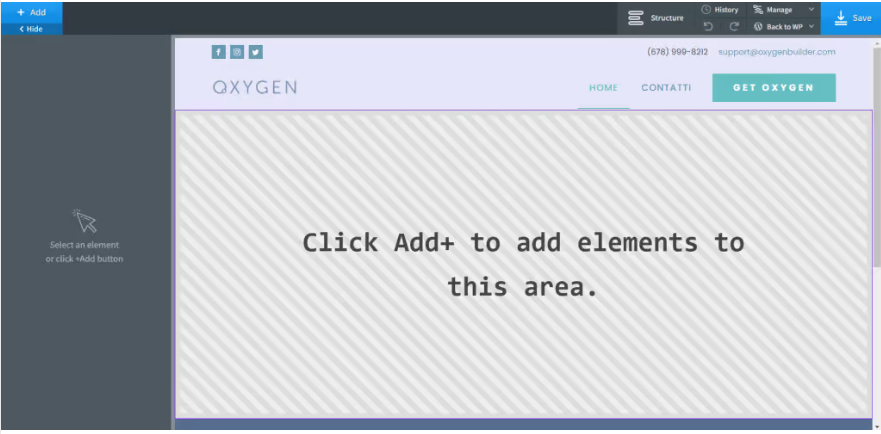
- This opens the editor, allowing you to add or change elements to customize your website.
- After customizing, save the changes. The changes will be published on the front end of your website.
Conclusion
Installing Oxygen Builder is an important step toward transforming your WordPress website into a fully customizable, high-performance platform. This powerful visual editor provides you with the tools you need to create flexible, visually appealing, and functionally robust websites without requiring extensive coding experience. By following this guide, you will effectively use Oxygen Builder.
FAQS
Q: Can Oxygen Builder be used with other WordPress plugins?
Yes, Oxygen Builder works with most WordPress plugins. However, it is always a good idea to test for compatibility issues, particularly with plugins that affect site layout and design.
Q: Is Oxygen Builder suitable for beginners?
It is easy to use. Beginners may need time to understand all the features, but numerous courses and resources are available to help.
Q: What should I do if I have problems during installation?
If you have problems during installation, ensure that you are using the most recent version of WordPress and that there are no conflicts with other plugins. If the problem persists, consult the Oxygen Builder documentation or contact the support team for assistance.