Schema markup is a powerful SEO method that increases the visibility of your website while also delivering structured information about your content to search engines. Unlock the power of structured data with our comprehensive guide on how to add schema markup in WordPress. In this article, we’ll show you how to add schema markup to your WordPress site, unlocking the potential for higher search engine ranks.
Table of Contents
What is Schema Markup?
Schema markup is also known as structured data. It is a code that you can add to your website to assist search engines in giving more useful and visually appealing results to users. It helps search engines understand the context of your content, making it easier for them to display relevant information in search results.
Is It Best to Add Schema With or Without a Plugin?
It’s always best to add schema markup using a plugin. The main reason for this is that plugins are faster and easier to use. They also help ensure the schema code is correct. When considering whether to add Schema Markup with or without a plugin, several factors come into play, including technical expertise, website platform, customization needs, and convenience. Here’s a breakdown of both approaches:
Using a Plugin:
| Pros | Cons |
| Ease of Use: Plugins often offer a user-friendly interface, making it simple for website owners without technical expertise to implement Schema Markup. | Limited Customization: Some plugins may have limited options for customization, especially for more complex schema types or specific requirements. |
| Automation: Many plugins automate the process of adding Schema Markup to your website, reducing the manual effort required. | Performance Impact: Depending on the plugin’s efficiency, adding extra code to your website could potentially impact performance of your website. |
| Updates and Maintenance: Plugins typically receive updates to ensure compatibility with the latest standards and changes in search engine algorithms. | Dependency on Plugin Developers: If the plugin developers cease support or updates, it may leave your Schema Markup outdated or incompatible with future changes. |
Implementing Without a Plugin:
| Pros | Cons |
| Full Control and Customization: Implementing Schema Markup manually allows for complete control over the code and customization to meet specific needs. | Technical Complexity: Implementing Schema Markup manually requires a certain level of technical proficiency in HTML, JSON-LD, or other markup languages. |
| Optimized Performance: By hand-crafting Schema Markup, you can ensure it’s optimized for performance, reducing unnecessary code bloat. | Time-consuming: Compared to using a plugin, manually adding Schema Markup can be more time-consuming, especially for larger websites with numerous pages. |
| Deep Understanding: Implementing Schema Markup manually can deepen your understanding of structured data and how it integrates with your website. | Risk of Errors: Without the safeguards provided by plugins, there’s a higher risk of errors or incorrect implementation when adding Schema Markup manually. |
| No Dependency on Third-party Plugins: You’re not reliant on the ongoing support or updates of a third-party plugin. | Maintenance Overhead: Regular maintenance and updates may be necessary to keep Schema Markup aligned with changes in your website’s content |
Benefits of Adding Schema Markup:
There are several advantages to including schema markup on your website. The following are some of the main benefits of using schema markup:
- Enhanced Exposure in Search Engines: Search engines can better comprehend the information on your pages by using structured data provided by schema markup. This understanding may lead to increased visibility in search results.
- Enhanced Search Results: Search engines produce rich snippets using schema markup, improving how your listings appear in search results. Rich snippets can contain more data, such as costs, ratings, reviews, and more.
- CTRs (click-through rates) Increased: Rich snippets improve the visual appeal and informative value of your listings. Users are more likely to click on results that provide additional context, resulting in increased click-through rates.
- Improved User Experience: Schema markup helps to improve the user experience by directly providing relevant data in search results. Users may instantly check your content’s suitability without clicking through the page.
- Structured Data: Using schema markup, you can include structured data about your content, such as product specifications and event details. Both users and search engines can benefit from this structured information.
- Competitive Advantage: Using schema markup makes your listings stand out in search results from rival listings. A visually appealing and information-rich snippet can capture visitors’ attention and persuade them to choose your material.
- Support for Various Content Types: Schema markup is used for a variety of content types, including articles, events, products, reviews, and more. You can apply structured data to many parts of your website due to its versatility.
3 Easy Ways to Add Schema Markup to Your Site:
There are three ways to add schema markup to your WordPress website:

Adding Schema Markup through Themes
To add schema markup through themes in WordPress:
- First, determine the content type you want to mark up, and then select a theme that supports schema integration.
- Navigate to the “Appearance” section of your WordPress dashboard to access the theme editor. Find the template file that corresponds to the content type (for example, single.php for single posts).
- Insert the schema markup directly into the template’s HTML structure. Ensure the markup is placed precisely and accurately to correspond to the appropriate content components.
- After you save the changes, your WordPress theme will have a schema markup installed, giving search engines structured data that will improve their understanding of your content.
- Use Google’s Rich Results Test for schema markup test regularly to fix any issues and maximize its efficacy.
Adding Schema Markup Manually
You can manually apply Schema markup to a WordPress site using the following steps:
- Enable Custom Fields: To add Schema to a page or post, access it from your WordPress Dashboard. Click the three vertical dots in the upper-right corner, then scroll to the bottom of the new sidebar and select Options. Check that the Custom Fields option is enabled under Advanced Panels.
- Create Your Code: To locate the markup you want to include in your content, go to Schema.org. For example, if you want to include the article markup, you may obtain the necessary code at Schema.org.
- Insert the Code: You can add the Schema markup code to your WordPress website after you obtain it. You can add the code to the Custom Fields section if you’re adding it to a specific page or post.
- Update Your Header File: The header.php file in your theme contains the code that you may update to apply the Schema markup to the entire website. This will guarantee that your entire website uses Schema markup.
- Check Your Markup: It’s crucial to validate the schema markup after adding it to make sure there are no errors. You can accomplish this by using Google’s Structured Data Testing Tool.
- Repeat for the Other Content Type: If you have several types of material to mark up, repeat the process for each, using the relevant Schema types.
- Save and Update: After making edits in the HTML editor, save the page or post and update or publish it.
- Examine the Search Results: Search engines could take some time to understand schema markup. Check your marked-up content’s search results after some time to see if rich snippets are showing up.
Adding Schema Markup through Plugin
If you’re already using the Yoast plugin for search engine marketing on your WordPress website, the good news is that you can use this plugin to add Schema markup. Let’s see how it works.
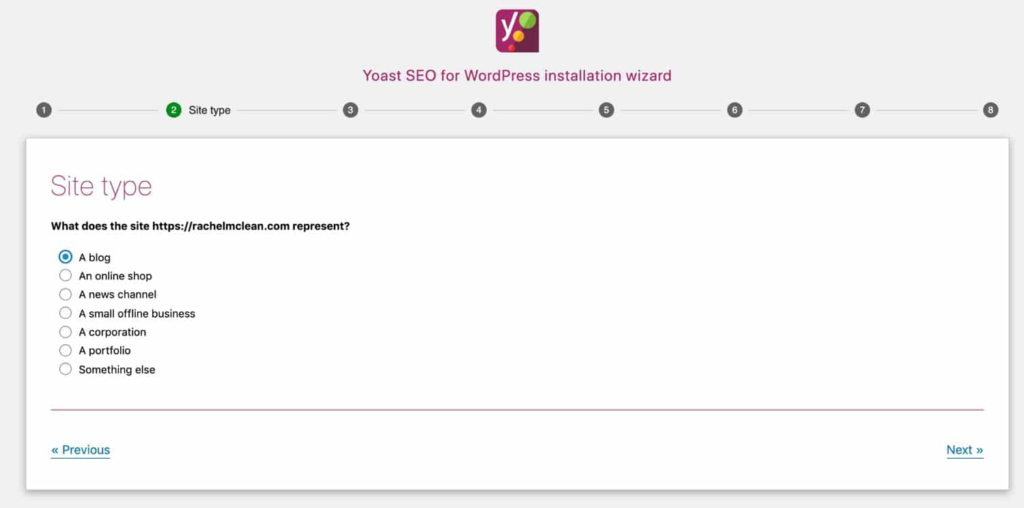
Yoast will ask you for details during the setup process, including social media links and the entity the website represents. Adding Schema markup to your WordPress website involves all of this.
First up, you’ll be asked what type of organization the site represents.

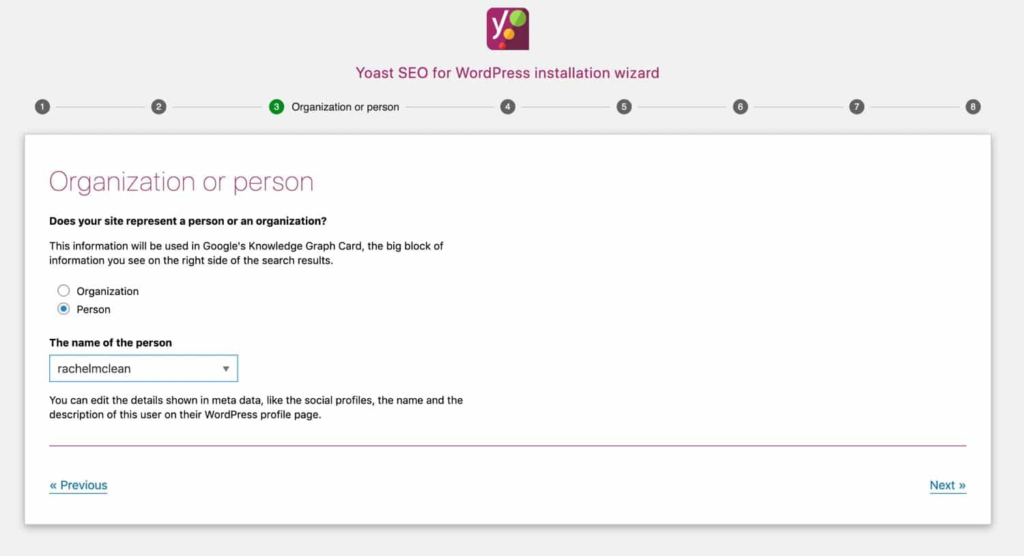
Then you’re asked for the name of the person or company. If it’s an organization, you’ll also need to add a logo. In the screenshot below, I’ve chosen a user as the person the site represents. If you need to change information about the person, you do that via their profile page.

If your site represents a person who doesn’t have a user account, you have two options. . Either choose the Organization option and fill in the details as if the person is an organization or set up a user account with an email address that’s an alias of your own, so your client won’t start receiving emails from the system.
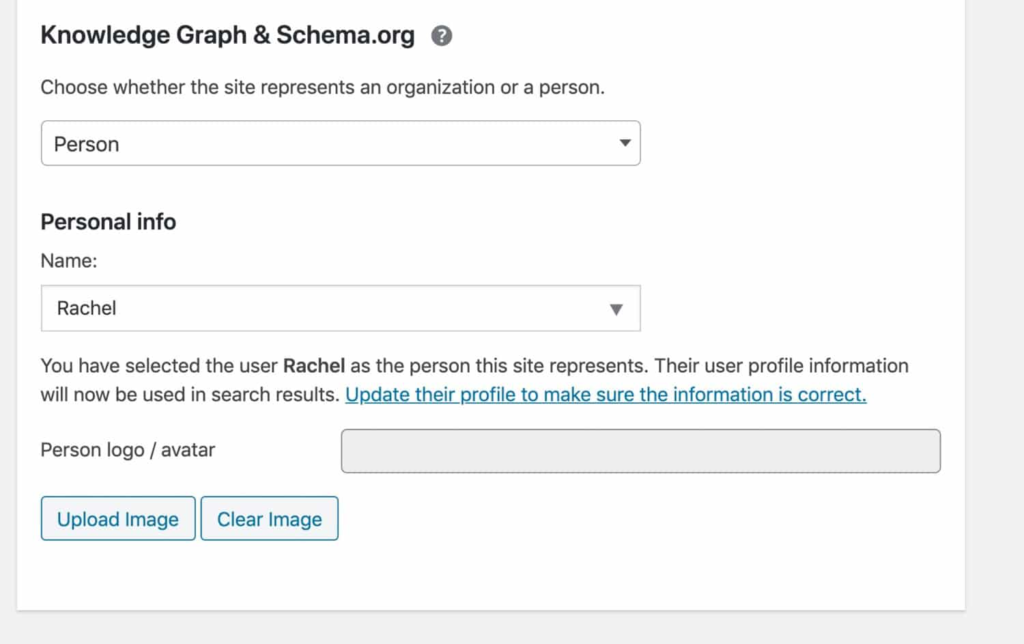
Go to SEO > Search Appearance and choose the General option if you need to adjust the kind of entity your website represents at any time. Enter the correct information in the Knowledge Graph & Schema.org area by scrolling down.

If the site represents an organization or a person who doesn’t have a user account, you can simply input information on that person or organization instead of selecting a user. To do this, go to SEO > Social.
Yoast will automatically add data types and Schema markup to your WordPress site after you’ve configured the website type.
Examples of how Yoast adds Schema markup to your WordPress site include:
- Full entity graphs, based on the content types in your site and the settings for the site type. This is the list of entities and content types on your site, as displayed when you test in the Google Structured Data Testing Tool.
- Marking up single posts and pages with article and author data types.
- Mark up archive pages with the appropriate data type, e.g., CollectionPage for taxonomy and date archives and ProfilePage for author archives.
- Marking up search results as SearchResultsPage.
Another exciting function is Yoast Structured Data Blocks. You can use these to add FAQs, how-tos to your posts or pages, and the relevant schema markup will be used to tell search engines what they are.

You can also add extra Schema markup with Yoast add-ons, such as location data types with the Local SEO add-on and News data with the News SEO add-on.
Alternative plugins
How to Add Schema Markup in WordPress: Conclusion
Adding schema markup to your WordPress website is an effective SEO strategy that can improve your search engine rankings. You can boost the visibility and appeal of your content in search results by giving search engines structured information. Schema markup has advantages that go beyond search engine optimization; it also enhances user engagement and experience. Embracing schema markup becomes a strategic decision for website owners who want to stay ahead in the competitive digital market. Adding schema markup to your WordPress website is a simple yet effective way to increase your internet visibility, especially when you follow the instructions and advantages listed in the article.
FAQs
What is schema markup, and why is it necessary for my WordPress website?
Schema markup is a structured data vocabulary that allows search engines to better interpret the material on your website. Rich snippets are essential for raising your site’s search engine visibility and optimizing how it shows up in search results.
Do I need coding knowledge to add schema markup to my WordPress website?
No, coding experience is not a requirement. There are user-friendly plugins available that allow you to add schema markup without writing code. However, understanding basic HTML tags can help with manual changes.
What are the benefits of schema markup?
Schema Markup helps search engines understand the context of your content, leading to better indexing and potentially higher rankings in search results.


